












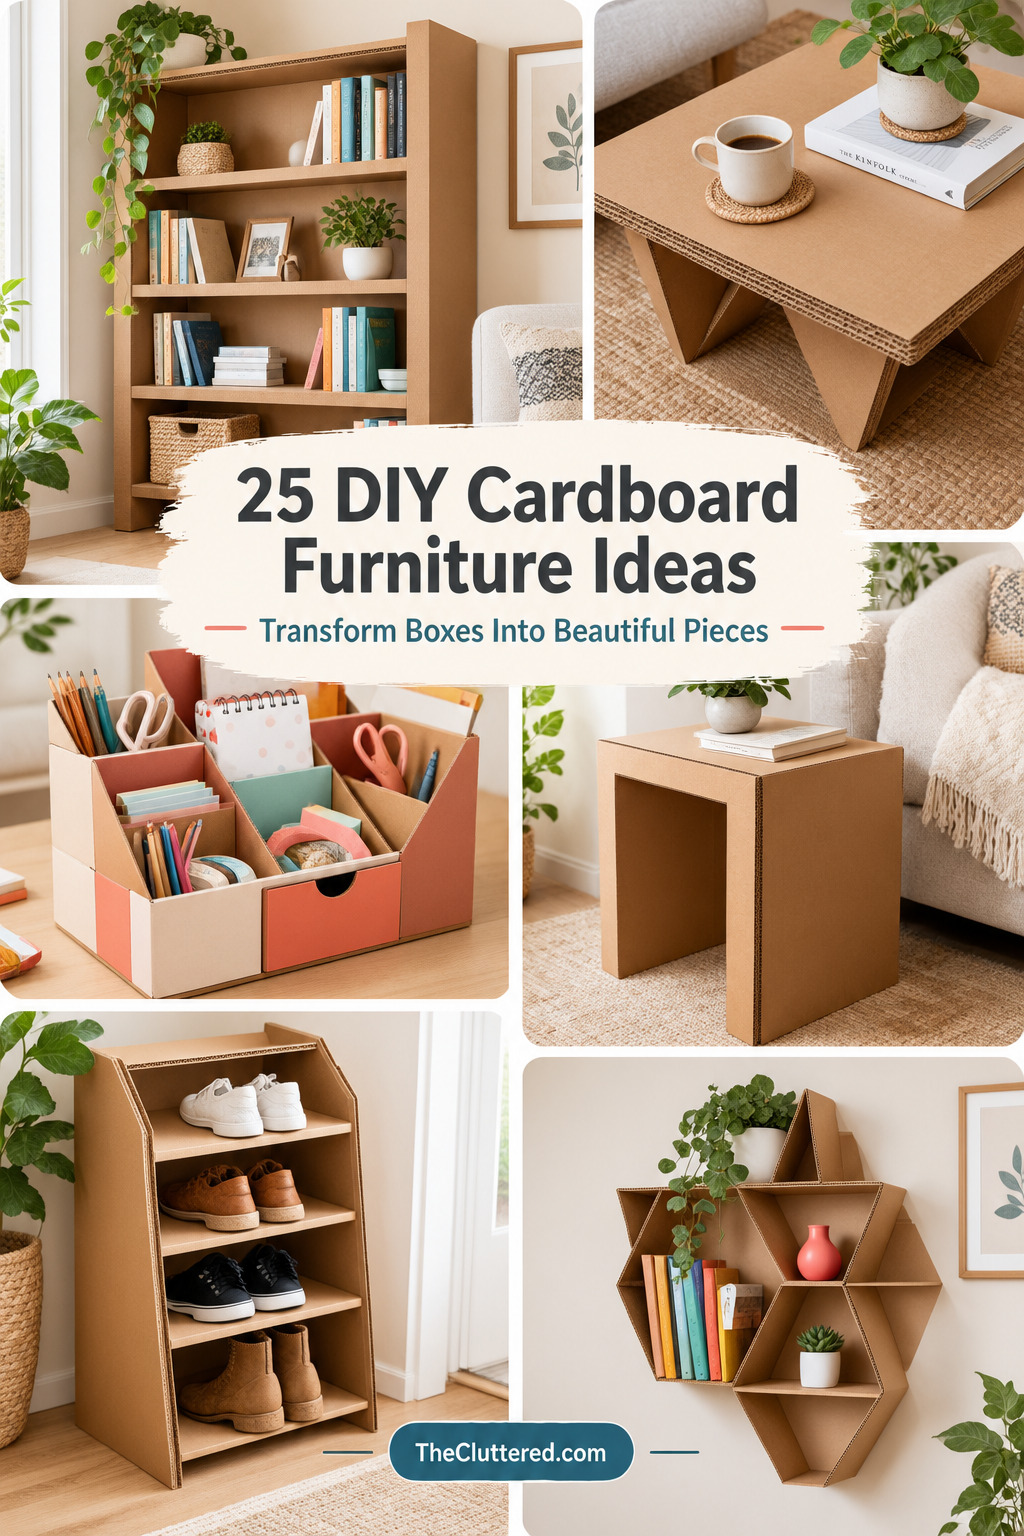


Turning cardboard boxes into functional furniture might sound like a craft project for kids, but it’s actually one of the most practical and creative ways to furnish your home on a budget. Whether you’re furnishing a first apartment, organizing a small space, or simply looking for eco-friendly DIY projects, cardboard furniture offers endless possibilities that are surprisingly sturdy and stylish.
The best part? You probably already have the main material sitting in your recycling bin. With some basic tools, a bit of creativity, and the techniques we’ll share here, you can transform ordinary shipping boxes into bookshelves, coffee tables, storage organizers, nightstands, and even seating that actually holds up to daily use. These projects prove that sustainable living doesn’t have to break the bank or compromise on aesthetics.
In this guide, we’ll walk you through 25 inspiring DIY cardboard furniture ideas, from simple beginner-friendly projects to more advanced designs. You’ll discover how to reinforce cardboard for durability, create beautiful finishes, and build pieces that look anything but temporary. Let’s turn those boxes into something beautiful.
Quick Start: Choose Your Project
Not sure where to begin? Here’s a quick guide to help you find the perfect cardboard furniture project based on your needs:
Best for Beginners
- Simple storage boxes and organizers – Basic cutting and assembly
- Wall shelves – Minimal tools required
- Shoe racks – Straightforward construction
Best for Small Spaces
- Vertical shelving units – Maximize wall space
- Under-bed storage – Utilize hidden areas
- Folding furniture – Easy to store when not in use
Best for Maximum Impact
- Coffee tables – Centerpiece furniture
- Bookshelves – Functional statement pieces
- Desks – Practical workspace solutions
Best for Storage
- Multi-compartment organizers – Desk and closet solutions
- Drawer units – Replace expensive storage furniture
- Cabinet systems – Modular storage walls
Essential Materials and Tools
Before diving into your cardboard furniture projects, gather these essential supplies:
Materials
- Cardboard boxes – Various sizes, preferably thick corrugated cardboard
- White glue or wood glue – For strong bonds between layers
- Packing tape – Clear or brown
- Contact paper or fabric – For finishing and decoration
- Paint – Acrylic or spray paint in your choice of colors
- Clear sealant – Mod Podge or polyurethane for durability
Tools
- Box cutter or utility knife – Sharp blades for clean cuts
- Metal ruler or straight edge – For precise measurements
- Cutting mat – Protects your work surface
- Hot glue gun – For quick assembly
- Scissors – For detailed cutting
- Paintbrushes – Various sizes
- Sandpaper – For smoothing edges
How to Make Cardboard Furniture Strong and Durable
The secret to sturdy cardboard furniture lies in proper construction techniques. Here are the key methods:
Layering Technique
Single-layer cardboard won’t support much weight, but stacking and gluing multiple layers creates surprisingly strong panels. For furniture that needs to bear weight (like tables or shelves), use at least 3-5 layers of corrugated cardboard glued together with the corrugation running in alternating directions. This cross-grain approach prevents warping and adds structural integrity.
Honeycomb Structure
For maximum strength with less material, create a honeycomb or grid pattern inside hollow furniture pieces. Cut cardboard strips and arrange them in a grid pattern inside boxes or between panels. This internal support system distributes weight evenly and prevents collapse.
Edge Reinforcement
Edges are the weakest points in cardboard construction. Reinforce them by wrapping with extra strips of cardboard or applying multiple layers of packing tape. For a cleaner look, fold and glue cardboard strips around raw edges before finishing.
Proper Adhesive Application
Don’t skimp on glue. Apply generous, even layers between cardboard pieces and allow adequate drying time under weight or pressure. For the strongest bonds, use wood glue or white craft glue rather than just hot glue, though hot glue works well for quick assembly of non-weight-bearing parts.
Finishing Techniques for Professional Results
The difference between “obviously cardboard” and “stylish furniture” often comes down to finishing:
- Smooth surfaces: Apply a thin layer of joint compound or spackle, sand smooth, then paint
- Fabric covering: Use spray adhesive or Mod Podge to wrap furniture in fabric for a soft, upholstered look
- Contact paper: Quick and easy way to add patterns, wood grain, or solid colors
- Paint and seal: Prime with white paint, add your color, then seal with clear polyurethane for durability
- Decorative tape: Washi tape or decorative packing tape can add patterns and hide seams
25 Creative DIY Cardboard Furniture Ideas
Now let’s explore 25 inspiring projects, from simple organizers to impressive furniture pieces. Each idea includes visual examples and practical tips to help you recreate them at home.
DIY Cardboard Storage Rack

Source: Pinterest
This clever storage rack demonstrates how simple cardboard boxes can be transformed into a functional, multi-tiered organization system. The design features multiple compartments of varying sizes, perfect for storing books, stationery, office supplies, or decorative items. The natural kraft brown finish gives it an earthy, minimalist aesthetic that works well in any room.
What makes this project particularly appealing is its simplicity and versatility. You don’t need advanced crafting skills or expensive materials—just sturdy cardboard boxes, a box cutter, and some glue. The modular design allows you to customize the compartment sizes based on what you need to store, making it adaptable for different spaces and purposes.
To recreate this, start with boxes of similar depth, cut them to your desired heights, and arrange them in a visually pleasing configuration. Secure them together with strong glue or double-sided tape, then reinforce the joints with packing tape. For a polished look, cover the raw edges with decorative tape or paint the entire piece in a color that matches your decor.
Eco-Friendly Cardboard Furniture Collection

Source: Pinterest
This impressive collection showcases how cardboard can be used to create an entire furniture set, including seating, tables, and storage pieces. The designs feature clean lines and modern aesthetics, demonstrating that eco-friendly furniture doesn’t have to sacrifice style. The layered construction technique creates visual interest while adding structural strength.
These pieces prove that cardboard furniture can be both beautiful and functional. The key is using high-quality, thick corrugated cardboard and employing proper construction techniques like cross-grain layering and internal support structures. When finished correctly, these pieces can support regular use and last for years.
To achieve similar results, focus on creating strong base structures with multiple layers of cardboard. Use a honeycomb or grid pattern inside larger pieces for added support. Finish with paint, contact paper, or fabric to create a cohesive look across your furniture set. Consider the weight capacity of each piece and reinforce high-stress areas accordingly.
DIY Cardboard Coffee Table

Source: Pinterest
This coffee table demonstrates advanced cardboard construction techniques, featuring a geometric layered design that’s both visually striking and structurally sound. The table uses multiple layers of corrugated cardboard arranged in a cross-hatch pattern to create a solid, weight-bearing surface that can hold books, drinks, and decorative items.
The beauty of this design lies in its simplicity and strength. By cutting identical shapes and stacking them with the corrugation running in alternating directions, you create a table that’s surprisingly durable. The finished piece has a sculptural quality that makes it a conversation starter while serving as functional furniture.
To build your own, start by cutting multiple identical tabletop shapes from thick cardboard. Stack and glue them together, allowing each layer to dry completely before adding the next. Create legs using the same layering technique or by rolling cardboard into sturdy tubes. Finish with several coats of sealant to protect the surface from moisture and wear.
Cardboard Room Organizer

Source: Pinterest
This versatile organizer shows how cardboard can solve everyday clutter problems. The design features multiple compartments of different sizes, making it perfect for organizing everything from desk supplies and craft materials to cosmetics and kitchen items. The neutral finish allows it to blend seamlessly into any decor style.
What makes this project so popular is its practicality and ease of construction. You can customize the compartment sizes to fit your specific needs, and the whole project can be completed in just a few hours. It’s an excellent beginner project that delivers immediate results and tangible benefits.
Start with a sturdy cardboard box as your base, then cut dividers from additional cardboard. Measure your items first to determine the ideal compartment sizes. Secure the dividers with hot glue or strong craft glue, reinforcing the joints with extra cardboard strips. Cover with contact paper or paint for a finished look that matches your space.
Cardboard Corner Shelf

Source: Pinterest
This corner shelf design is perfect for maximizing unused space in small apartments or rooms. The triangular shape fits snugly into corners, providing valuable storage or display space without taking up floor area. Multiple tiers allow you to store books, plants, decorative items, or everyday essentials.
Corner shelves are particularly useful in dorm rooms, kids’ rooms, or any space where every square foot counts. The design is simple enough for beginners but looks professional when finished properly. You can create a single unit or stack multiple shelves for a floor-to-ceiling storage solution.
Cut triangular shelf pieces from sturdy cardboard, ensuring they’re identical for stability. Create support brackets from folded cardboard strips and attach them to the wall or to a vertical back panel. Stack shelves at your desired intervals, securing each with strong glue. For extra stability, add a vertical back panel that runs the full height of the unit.
Cardboard Bookshelf Design

Source: Pinterest
This bookshelf design proves that cardboard can handle the weight of heavy books when constructed properly. The piece features reinforced shelving with multiple layers of cardboard and strategic support structures. The finished result looks polished and professional, suitable for living rooms, bedrooms, or home offices.
Building a bookshelf that can actually support books requires careful planning and strong construction. The key is using thick, high-quality cardboard and creating shelves with at least 5-7 layers. Vertical supports should be reinforced with internal bracing to prevent bowing under weight.
Start by creating a sturdy frame with double or triple-layered cardboard. Cut shelf pieces slightly wider than the frame and reinforce each with multiple layers. Install shelves at your desired heights, using cardboard brackets or dado joints for support. Finish with paint or contact paper, and consider adding a backing panel for additional stability.
Creative Cardboard Furniture Art

Source: Pinterest
This collection showcases the artistic potential of cardboard furniture, featuring designs that go beyond basic functionality to create statement pieces. The projects demonstrate various techniques including sculptural forms, geometric patterns, and creative finishing methods that transform simple boxes into eye-catching furniture.
These artistic approaches to cardboard furniture are perfect for those who want their DIY projects to reflect personal style and creativity. Whether you prefer modern minimalism, bohemian eclecticism, or rustic charm, cardboard can be manipulated and finished to achieve virtually any aesthetic.
Experiment with different cutting techniques to create patterns and textures. Try layering cardboard to build three-dimensional designs, or use stencils and paint to add decorative elements. Don’t be afraid to combine cardboard with other materials like fabric, rope, or paint to create unique hybrid pieces that reflect your personal style.
Quirky Cardboard Bookshelf

Source: Pinterest
This quirky bookshelf design shows how cardboard can be used to create furniture with personality. The unconventional shape and construction method result in a piece that’s both functional and visually interesting. It’s perfect for displaying books, plants, or decorative objects in a way that sparks conversation.
The design demonstrates that cardboard furniture doesn’t have to follow traditional furniture patterns. By thinking outside the box—literally—you can create custom pieces that fit your specific space and style preferences. This particular design would work well in eclectic, bohemian, or artistic interiors.
To create a similar piece, sketch your design first, then cut cardboard pieces to match your pattern. Use the layering technique to build up thickness and strength in load-bearing areas. Assemble with strong glue and reinforce joints with cardboard brackets. Finish in a way that complements your design concept, whether that’s natural cardboard, bold paint colors, or decorative paper.
Cardboard Art and Decor

Source: Pinterest
Beyond furniture, cardboard makes an excellent material for creating wall art and decorative accents. These projects range from simple geometric shapes to intricate sculptural pieces, offering options for every skill level. The natural texture of cardboard adds warmth and interest to any space.
Cardboard art is particularly appealing because it’s low-risk and low-cost. You can experiment freely without worrying about wasting expensive materials. The projects are also lightweight, making them easy to hang and rearrange as your decor evolves.
Start with simple shapes like circles, triangles, or abstract forms cut from cardboard. Layer multiple pieces to create depth and dimension. Paint, stain, or cover with decorative paper to match your color scheme. For hanging, attach picture wire or adhesive hooks to the back. Combine multiple pieces to create a gallery wall or statement installation.
Practical Cardboard Storage Solutions

Source: Pinterest
This comprehensive collection demonstrates the incredible versatility of cardboard for storage solutions. From closet organizers to cabinet systems, these projects show how cardboard can replace expensive storage furniture while providing customized organization tailored to your specific needs.
The beauty of cardboard storage is its adaptability. You can create custom-sized compartments, adjustable shelving, and modular systems that grow with your needs. Unlike mass-produced storage furniture, cardboard solutions can be easily modified, expanded, or reconfigured as your storage requirements change.
When planning cardboard storage projects, start by assessing what you need to store and measuring your space. Design compartments that fit your items with a little room to spare. Use dividers, drawers, and shelves to maximize organization. Reinforce high-use areas and consider adding handles or labels for easy access. Finish with durable materials that can withstand regular use.
Cardboard Storage Unit

Source: Pinterest
This industrial-style storage unit demonstrates how cardboard can achieve a modern, sophisticated look. The design features clean lines and a modular structure that can be customized with different compartment configurations. It’s perfect for organizing everything from office supplies to craft materials.
The industrial aesthetic works particularly well with cardboard’s natural texture and color. By keeping the finish simple and focusing on strong geometric forms, you create furniture that looks intentional and designed rather than makeshift. This approach is ideal for contemporary or minimalist interiors.
Build this unit by creating a sturdy frame from multiple layers of cardboard, then adding dividers to create your desired compartment layout. Use cardboard strips to reinforce edges and corners. For an industrial look, leave some areas in natural cardboard while painting others in neutral tones. Add metal handles or labels for extra authenticity.
Recycled Cardboard Containers

Source: Pinterest
These creative container designs show how everyday cardboard boxes can be transformed into attractive storage solutions. From decorative bins to functional organizers, these projects demonstrate the endless possibilities of upcycling cardboard into useful home accessories.
Cardboard containers are particularly useful because they’re lightweight, customizable, and easy to replace or modify. You can create matching sets for a cohesive look or mix and match different sizes and styles for eclectic storage solutions. They’re perfect for closets, shelves, under-bed storage, or desktop organization.
To make your own containers, start with sturdy boxes and cut them to your desired height. Reinforce the edges with extra cardboard strips or decorative tape. Cover the exterior with fabric, contact paper, or paint to match your decor. Add handles made from rope, ribbon, or cut cardboard for easy transport. Line the interior with decorative paper for a polished finish.
Cardboard Side Table Ideas

Source: Pinterest
Side tables are among the most practical cardboard furniture projects, offering immediate utility while showcasing your creativity. These designs range from simple cylindrical forms to more complex geometric structures, providing options for every skill level and design preference.
The versatility of cardboard side tables makes them perfect for temporary housing situations, dorm rooms, or as accent pieces in permanent residences. They’re lightweight enough to move easily yet sturdy enough to hold lamps, books, drinks, and decorative items when properly constructed.
For a simple cylindrical table, roll cardboard tightly into tubes and secure with glue, then stack and glue multiple tubes together for strength. Top with a circular cardboard platform reinforced with multiple layers. For geometric designs, cut identical shapes and stack them, or create a frame structure with internal supports. Finish with paint, fabric, or decorative paper.
DIY Cardboard Bookshelf

Source: Pinterest
This clever bookshelf design transforms simple cardboard into an attractive display piece perfect for books, plants, or decorative objects. The construction uses smart engineering techniques to create a shelf that’s both visually appealing and structurally sound, proving that budget-friendly doesn’t mean low-quality.
The design demonstrates how thoughtful planning can maximize both strength and aesthetics. By using proper layering techniques and strategic support placement, this bookshelf can handle the weight of books while maintaining a sleek, modern appearance that complements contemporary interiors.
Start by planning your shelf dimensions based on what you’ll display. Cut multiple identical shelf pieces and reinforce each with 4-6 layers of cardboard. Create a sturdy frame with vertical supports, using internal bracing for added stability. Assemble with strong glue, allowing adequate drying time between steps. Finish with paint or contact paper for a polished look.
Cardboard Chair Design

Source: Pinterest
This modern armchair design represents the pinnacle of cardboard furniture engineering. Featuring armrests and a comfortable seating position, it demonstrates that cardboard can be used to create functional, adult-sized seating that’s both comfortable and visually striking.
Building a cardboard chair requires advanced construction techniques and careful attention to weight distribution and structural integrity. The result, however, is a conversation-worthy piece that showcases the incredible potential of recycled materials. This project is perfect for experienced DIYers looking for a challenging, rewarding build.
Use thick, high-quality corrugated cardboard and create the chair from multiple stacked layers cut to shape. The seat should have at least 10-15 layers for adequate support. Reinforce stress points with additional cardboard and use a honeycomb internal structure for strength. Test weight capacity gradually and add reinforcements as needed. Finish with cushioning and fabric for comfort.
Cardboard Storage Ideas

Source: Pinterest
These versatile storage ideas demonstrate how cardboard can solve organization challenges throughout your home. From shoe storage to desk organizers, these projects offer practical solutions that are easy to customize and adapt to your specific needs.
The beauty of cardboard storage is its flexibility. Unlike expensive storage furniture, cardboard solutions can be easily modified, expanded, or replaced as your needs change. They’re perfect for renters, students, or anyone looking for affordable organization options that don’t require a long-term commitment.
Assess your storage needs and measure your space before starting. Design compartments that fit your items comfortably, allowing for easy access. Use dividers, shelves, and drawers to maximize organization. Reinforce high-use areas and consider adding labels or color-coding for quick identification. Finish with durable materials that can withstand regular handling.
Cardboard TV and Entertainment

Source: Pinterest
Beyond functional furniture, cardboard opens up creative possibilities for entertainment pieces and props. From retro TV designs to media centers, these projects blend nostalgia with functionality, creating pieces that are both useful and whimsical.
These projects are particularly popular for kids’ rooms, play areas, or as unique decorative accents. They showcase cardboard’s versatility as a material that can be shaped, painted, and finished to resemble virtually anything you can imagine.
For a retro TV prop, cut the basic shape from thick cardboard, then add details like a screen, dials, and antenna using additional cardboard pieces. Paint in period-appropriate colors and add decorative elements. For functional entertainment centers, focus on creating sturdy shelving for media components, games, or accessories. Reinforce weight-bearing areas and finish to match your decor.
Cardboard Photo Frames and Decor

Source: Pinterest
Cardboard makes an excellent material for creating custom photo frames and decorative accents. These projects allow you to personalize your space with unique pieces that reflect your style while keeping costs minimal. The natural texture of cardboard adds warmth and character to any room.
Photo frames are particularly rewarding because they let you showcase cherished memories in creative ways. You can design frames in any shape or size, from simple rectangles to elaborate sculptural pieces. The projects are quick enough to complete in an afternoon yet impressive enough to gift or display prominently.
Cut your frame shape from sturdy cardboard, then cut out the center for your photo. Layer multiple pieces to create depth and dimension. Decorate with paint, fabric, buttons, or other embellishments. Add a backing piece with a stand or hanging mechanism. For a cohesive look, create a gallery wall with multiple frames in coordinating styles.
Cardboard Bed Frame and Headboard

Source: Pinterest
This ambitious project demonstrates how cardboard can be combined with other materials to create a complete bed frame and headboard. While the primary structure uses cardboard, the design incorporates foam, fabric, and other materials for comfort and durability, resulting in a custom piece that looks professionally made.
Building a bed frame requires careful planning and strong construction, but the results can be stunning. This project is ideal for those furnishing a bedroom on a tight budget or anyone who enjoys challenging DIY projects. The customizable nature means you can create a bed that fits your exact space and style preferences.
Use thick, high-quality cardboard for the main structure, reinforcing with wood or metal supports where needed for safety. Create the headboard from layered cardboard, then cover with foam padding and fabric for comfort. Ensure all weight-bearing areas are heavily reinforced. Test stability thoroughly before regular use. This project requires advanced skills and should prioritize safety above all.
Creative Cardboard Ideas Collection

Source: Pinterest
This diverse collection showcases the incredible range of possibilities when working with cardboard. From practical furniture to whimsical decor, these projects demonstrate that creativity and resourcefulness can transform simple boxes into beautiful, functional pieces for every area of your home.
The variety in this collection proves that cardboard furniture isn’t limited to one style or purpose. Whether you need storage solutions, seating, tables, or decorative accents, cardboard can be adapted to meet your needs while staying within budget and supporting sustainable living practices.
Use this collection as inspiration for your own projects. Don’t be afraid to combine ideas, modify designs, or invent completely new solutions. The best cardboard furniture comes from understanding the material’s properties and working with its strengths. Start with projects that match your skill level, then gradually tackle more complex builds as your confidence grows.
Paper Mache Cardboard Shelves

Source: Pinterest
Paper mache techniques take cardboard furniture to the next level, creating pieces with smooth, finished surfaces that hide the cardboard construction entirely. This method allows you to create sculptural shelves and furniture that look like they’re made from more expensive materials.
The paper mache process involves applying layers of paper strips soaked in adhesive over a cardboard base, then sanding and painting once dry. The result is a hard, durable surface that can be finished in any color or style. This technique is perfect for creating custom furniture with organic shapes or unique details.
Build your shelf structure from layered cardboard, ensuring it’s sturdy and properly reinforced. Mix white glue with water for your paper mache adhesive. Apply newspaper strips in multiple layers, allowing each to dry completely. Once fully dry, sand smooth and apply primer. Paint in your desired color and seal with clear polyurethane for durability. The finished piece will be surprisingly strong and water-resistant.
Cardboard Storage for Kids

Source: Pinterest
Kids’ rooms benefit greatly from cardboard storage solutions that can be easily customized, replaced, or modified as children grow and their needs change. These projects offer practical organization while allowing for creative, colorful designs that appeal to young imaginations.
Cardboard storage is particularly practical for kids because it’s lightweight (safe for children to move), affordable (easy to replace when damaged), and customizable (can be decorated with their favorite colors and themes). It’s also an excellent way to teach children about recycling and creative reuse.
Create colorful storage bins, toy organizers, book displays, and closet systems using sturdy cardboard boxes. Let kids help decorate with paint, stickers, or fabric. Use bright colors and fun patterns to make organization appealing. Label bins with pictures for younger children. Ensure all edges are smooth and safe. These projects can grow with your child, making them perfect long-term solutions.
Cardboard Furniture Ideas

Source: Pinterest
This comprehensive collection demonstrates the full potential of cardboard as a furniture material. From dressers and nightstands to cabinets and wardrobes, these projects show that cardboard can replace traditional furniture in virtually every category while offering unique customization opportunities.
The diversity of designs in this collection proves that cardboard furniture isn’t just for temporary solutions or craft projects. With proper construction techniques and finishing methods, cardboard pieces can serve as primary furniture in any home, offering both functionality and style.
When planning cardboard furniture projects, consider the specific requirements of each piece. Storage furniture needs strong drawers and reinforced shelves. Seating requires adequate weight support and comfort considerations. Tables need stable bases and durable surfaces. Match your construction techniques to the intended use, always prioritizing safety and durability.
Modern Cardboard Table Designs

Source: Pinterest
These modern designs showcase how cardboard can achieve a contemporary, sophisticated aesthetic. The clean lines, geometric forms, and minimalist approach demonstrate that eco-friendly furniture can be just as stylish as traditional options, often with more unique character.
Modern cardboard furniture appeals to those who appreciate sustainable design, minimalist aesthetics, and innovative use of materials. These pieces work particularly well in contemporary interiors, small spaces, or as statement pieces that showcase environmental consciousness without sacrificing style.
To achieve a modern look, focus on clean geometric shapes, precise construction, and neutral or monochromatic color schemes. Use the layering technique to create smooth, solid surfaces. Finish with matte paint in white, black, gray, or natural cardboard tones. Pay attention to proportions and balance—modern design favors simplicity and functionality over ornamentation.
Easy DIY Cardboard Shelves

Source: Pinterest
This beginner-friendly shelf project is the perfect introduction to cardboard furniture making. The simple construction method and clear step-by-step approach make it accessible even for those with no prior DIY experience, while the results are practical and attractive enough to use in any room.
Shelves are ideal starter projects because they teach fundamental cardboard construction techniques—cutting, layering, gluing, and reinforcing—without requiring advanced skills. Once you master shelf-making, you’ll have the confidence and knowledge to tackle more complex furniture projects.
Start with a simple design: cut identical shelf pieces from thick cardboard, reinforce each with 3-5 layers, and create support brackets or a backing panel. Assemble with strong glue, ensuring all joints are secure. For wall-mounted shelves, use appropriate hardware and anchors. For freestanding units, create a stable base. Finish with paint or decorative paper. This project typically takes 2-4 hours and costs almost nothing.
Love these ideas? Follow @theclutteredblog on Pinterest for more cozy, practical gift inspiration!