









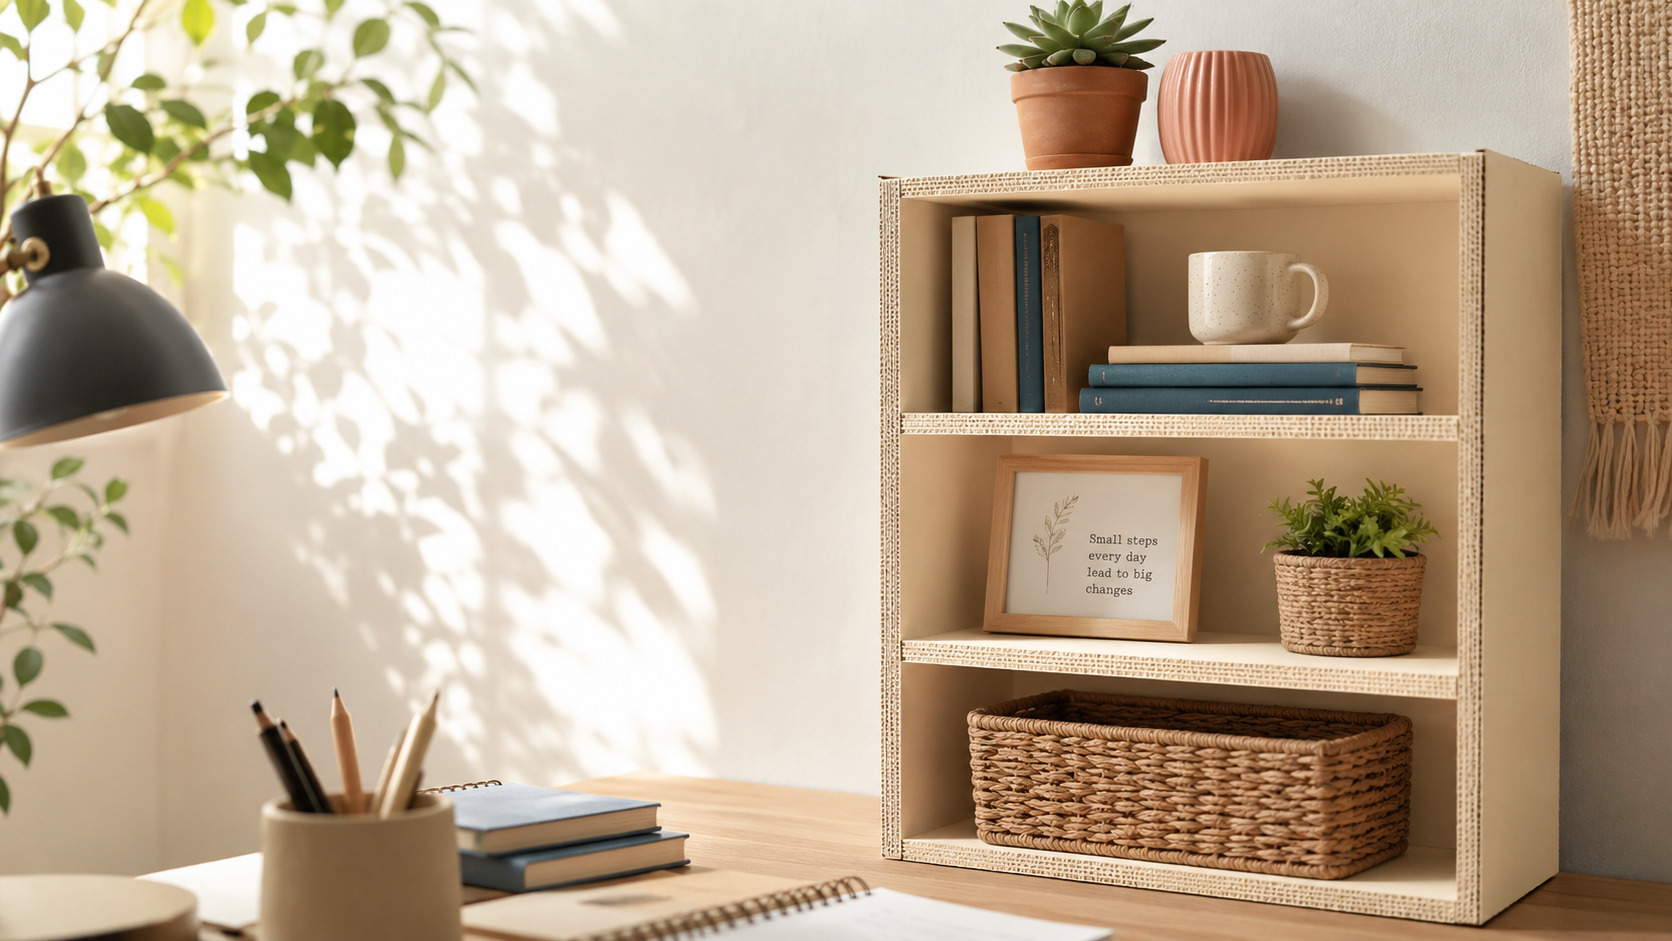
Who says storage has to be expensive? If you’ve been staring at a pile of cardboard boxes wondering if they’re worth keeping, we’ve got amazing news for you. With just a few simple tools and about an hour of your time, you can transform ordinary cardboard into a charming, functional shelf that looks way more expensive than it actually is.


This DIY cardboard shelf project is perfect for anyone working with a tight budget, whether you’re a student furnishing your first apartment, a parent organizing playrooms, or simply someone who loves creative upcycling projects. The best part? You don’t need advanced carpentry skills or a garage full of tools—just cardboard, hot glue, and a bit of creativity.
Save this idea for your next weekend DIY project and follow @theclutteredblog for more budget-friendly home organization ideas.

Find the Right Cardboard Shelf Style for Your Space
Before diving in, it helps to know which type of cardboard shelf will work best for your needs. Not all DIY shelves are created equal, and choosing the right design from the start will save you time and materials.
For beginners: Start with a simple 3-tier rectangular shelf. It’s the most forgiving design and requires minimal cutting precision.
For small spaces: Consider a narrow, tall bookshelf design that maximizes vertical storage without taking up much floor space.
For decorative purposes: Try an arched-top or scalloped-edge design that adds visual interest to bedrooms or living rooms.
For heavy-duty storage: Reinforce your shelf with double-layer cardboard and extra support brackets made from cardboard triangles.
For a polished look: Plan to cover your finished shelf with contact paper, fabric, or paint for a custom finish that matches your decor.

Why Cardboard Shelves Are Worth Your Time
Budget-Friendly Storage That Actually Looks Good
Let’s be real—furniture shopping can drain your wallet fast. A simple bookshelf from a furniture store can easily cost $50-$150, but a cardboard shelf costs virtually nothing if you already have boxes on hand. Even buying all your materials from scratch (cardboard, glue, paint), you’re looking at under $20 total.
The money you save can go toward other priorities: paying off student loans, building an emergency fund, or treating yourself to something you actually want. Plus, there’s a unique satisfaction in looking at your shelf and knowing you made it yourself from materials most people throw away.
Eco-Friendly Upcycling at Its Best
Every year, millions of tons of cardboard end up in landfills. By repurposing cardboard boxes into useful furniture, you’re keeping waste out of the trash and reducing demand for new materials. It’s a small action, but when multiplied across thousands of DIY enthusiasts, it makes a real environmental difference.
This project is especially meaningful if you’re trying to live more sustainably but feel limited by budget constraints. You don’t need to buy expensive eco-friendly products to make a positive impact—sometimes the most sustainable choice is simply using what you already have.
Perfect for Temporary or Flexible Living Situations
Renters, students, and anyone who moves frequently knows the pain of investing in furniture that’s heavy, expensive to move, or doesn’t fit the next place. Cardboard shelves are lightweight, easy to disassemble, and if they get damaged during a move? No big loss—you can just make another one.
They’re also ideal for testing out a layout before committing to permanent furniture. Want to see if a bookshelf in that corner will work? Make a cardboard version first. Love it? Great! Hate it? You’ve only invested a few hours and some glue sticks.

Materials You’ll Need (Most You Probably Already Have)
The beauty of this project is its simplicity. Here’s what you’ll need:
Essential Materials:
- Cardboard boxes (the thicker, the better—appliance boxes or moving boxes work wonderfully)
- Hot glue gun and plenty of glue sticks (you’ll use more than you think)
- Box cutter or utility knife with fresh blades
- Metal ruler or straight edge
- Pencil for marking cuts
Optional Finishing Materials:
- Acrylic paint or spray paint
- Decorative paper, contact paper, or fabric
- Clear sealant or Mod Podge
- Sandpaper (for smoothing rough edges)
- Washi tape for decorative accents
Tools That Make Life Easier:
- Cutting mat or protective surface
- Clamps or heavy books (to hold pieces while glue dries)
- Paintbrushes
- Drop cloth or newspaper
Don’t have a hot glue gun? White wood glue or strong craft glue works too, though drying time will be longer. The key is using enough glue and allowing adequate drying time between steps.
Step-by-Step: Building Your Cardboard Shelf
Step 1: Plan and Measure Your Design
Before cutting anything, decide on your shelf dimensions. A good starting size for a beginner project is:
- Height: 24 inches
- Width: 18 inches
- Depth: 10 inches
- 3-4 shelves evenly spaced
Sketch your design on paper with exact measurements. This blueprint will be your roadmap and helps prevent costly cutting mistakes.
Step 2: Cut Your Cardboard Pieces
Using your measurements, cut the following pieces:
- Back panel: 24″ x 18″ (1 piece)
- Shelves: 10″ x 18″ (3-4 pieces, depending on desired shelves)
- Side panels: 10″ x 24″ (2 pieces)
- Reinforcement strips: 2″ x 18″ (4-6 pieces for extra strength)
Pro tip: Use your metal ruler as a guide when cutting to ensure straight, clean edges. Cut slowly and let the blade do the work—rushing leads to jagged edges.
Step 3: Create the Basic Frame
Start by attaching the side panels to the back panel using hot glue. Apply a generous bead of glue along the edge of the side panel, press firmly against the back panel, and hold for 30 seconds. Repeat on the other side.
For extra stability, add cardboard triangles (cut from scraps) in the inside corners where the side panels meet the back panel. These act as corner brackets and prevent wobbling.
Step 4: Install the Shelves
Mark shelf positions on the inside of your side panels with a pencil. Space them evenly, or customize based on what you plan to store (taller spaces for books, shorter for decorative items).
Apply hot glue along the bottom edge of each shelf and the points where it contacts the side panels and back panel. Press into place and hold until the glue sets. Work from bottom to top for easiest assembly.
Step 5: Reinforce for Strength
This step separates a flimsy shelf from a sturdy one. Add reinforcement by:
- Gluing cardboard strips along the front edge of each shelf
- Adding triangular supports underneath each shelf
- Doubling up the side panels with a second layer of cardboard
- Reinforcing the back panel with a cardboard frame around the edges
Let all glue dry completely (at least 2-3 hours) before moving to the next step.
Step 6: Finish and Decorate
Now for the fun part—making it beautiful! You have several options:
Paint it: Apply 2-3 coats of acrylic or spray paint for a clean, uniform look. Neutral colors like white, cream, or soft gray blend with any decor.
Cover it: Use contact paper, scrapbook paper, or fabric to cover the entire shelf. This hides cardboard texture and adds pattern or color.
Embrace it: Leave the natural cardboard visible for a rustic, industrial aesthetic. Just seal with clear Mod Podge to protect from dust and moisture.
Mix and match: Paint the inside one color and the outside another, or add decorative washi tape along edges for pops of color.
Step 7: Style Your New Shelf
Once your shelf is complete and fully dry, it’s time to style it! Here are some ideas:
- Books + plants: Alternate books with small potted plants for a fresh, lived-in look
- Photo display: Mix framed photos with small decorative objects
- Bathroom storage: Store towels, toiletries, and pretty jars
- Kitchen organization: Display cookbooks, canisters, and herbs
- Office supplies: Keep desk organized with labeled bins and supplies
Remember to distribute weight evenly—heavier items on lower shelves, lighter decor on top.

Practical Tips for Long-Lasting Cardboard Furniture
Maximize Strength:
- Use double-walled cardboard (the kind with two layers of corrugation)
- Apply multiple thin layers of glue rather than one thick layer
- Let each section dry completely before adding weight
- Avoid placing in humid areas like bathrooms unless sealed well
Protect from Wear:
- Seal with 2-3 coats of Mod Podge or clear acrylic sealer
- Add felt pads to the bottom to protect floors
- Keep away from direct sunlight to prevent fading
- Dust regularly with a dry cloth
Know the Limitations:
- Best for light to medium-weight items (books, decor, photos)
- Not suitable for heavy textbooks or encyclopedias
- Avoid storing liquids unless containers are sealed
- Replace if cardboard shows signs of warping or weakening
Budget Variations:
- $0 version: Use only materials you have at home
- Under $10: Buy just glue sticks and paint
- Under $20: Add decorative paper, sealant, and nice paint
Creative Variations to Try
Once you’ve mastered the basic shelf, experiment with these designs:
Arched Top Shelf: Cut the back panel with a curved top edge for a softer, more decorative look.
Cubby Organizer: Create a grid of small square compartments perfect for organizing craft supplies, makeup, or kids’ toys.
Corner Shelf: Design a triangular shelf that fits into corners, maximizing unused space.
Tiered Display: Build shelves at varying depths for a stepped, gallery-like appearance.
Wall-Mounted Version: Skip the back panel and mount individual shelves directly to the wall with brackets.
Desk Organizer: Scale down the design to create a desktop organizer for pens, papers, and supplies.
Common Mistakes to Avoid
Cutting inaccurately: Measure twice, cut once. Crooked cuts compound into an unstable shelf.
Using weak cardboard: Cereal box cardboard is too thin. Aim for moving boxes, appliance boxes, or furniture packaging.
Rushing the glue: Hot glue needs time to set. Holding pieces for 30-60 seconds prevents shifting.
Skipping reinforcement: The extra 20 minutes spent adding supports doubles your shelf’s lifespan.
Overloading too soon: Wait at least 24 hours before placing heavy items on your finished shelf.
Poor ventilation: If painting indoors, work in a well-ventilated area and let paint cure fully.
FAQ
How much weight can a cardboard shelf hold?
A well-constructed cardboard shelf with proper reinforcement can typically hold 10-20 pounds per shelf, depending on the cardboard thickness and design. Double-walled cardboard with triangular supports handles the most weight. For reference, that’s enough for standard paperback books, decorative items, small plants, and photo frames. Avoid placing heavy hardcover encyclopedias, large appliances, or anything over 25 pounds on a single shelf.
How long does a cardboard shelf last?
With proper construction and care, a cardboard shelf can last 1-3 years or even longer. The lifespan depends on several factors: the quality of cardboard used, how well it’s sealed, the environment it’s stored in, and the weight it regularly holds. Shelves kept in dry, climate-controlled rooms and sealed with Mod Podge or paint last significantly longer than unsealed shelves in humid environments. If you notice warping, softening, or structural weakness, it’s time to build a replacement.
Can I make a cardboard shelf without a hot glue gun?
Yes, absolutely! While hot glue provides the fastest and strongest bond for cardboard, you can use alternatives. White wood glue (like Elmer’s Carpenter’s Wood Glue) creates an incredibly strong bond but requires 24 hours of drying time with pieces clamped or weighted down. Strong craft glue or even epoxy works too, though they’re more expensive. The trade-off is time versus convenience—hot glue lets you build in an afternoon, while other adhesives require planning ahead for drying time.
Is cardboard furniture safe and stable?
When constructed properly, cardboard furniture is surprisingly stable and safe for its intended use. The key is using thick, double-walled cardboard, applying adequate glue, and adding structural reinforcements like corner brackets and edge supports. Cardboard shelves work best for lightweight storage and decorative purposes. They’re not suitable for supporting heavy televisions, large aquariums, or as step stools. Always place cardboard furniture on level surfaces away from moisture, and regularly inspect for signs of wear or weakening.
What’s the best way to seal cardboard furniture?
The most effective sealants for cardboard are Mod Podge (applied in 2-3 thin coats), clear acrylic sealer spray, or a mixture of white glue and water (1:1 ratio). These create a protective barrier against moisture, dust, and wear while maintaining the cardboard’s structural integrity. For painted shelves, apply a clear topcoat over the paint for extra durability. Avoid using water-based sealants if you’re concerned about warping—spray sealants are your best bet. Always apply sealant in a well-ventilated area and allow 24-48 hours for complete curing.
Building a DIY cardboard shelf is one of those rare projects that delivers maximum impact with minimal investment. You’ll save money, reduce waste, and create something genuinely useful—all while developing skills that’ll serve you for future DIY adventures. Whether you’re furnishing a dorm room, organizing a small apartment, or just looking for a satisfying weekend project, this cardboard shelf proves that beautiful, functional storage doesn’t require a big budget.
Save this tutorial for your next DIY session, and don’t forget to follow @theclutteredblog for more creative ways to make your space beautiful without breaking the bank.