








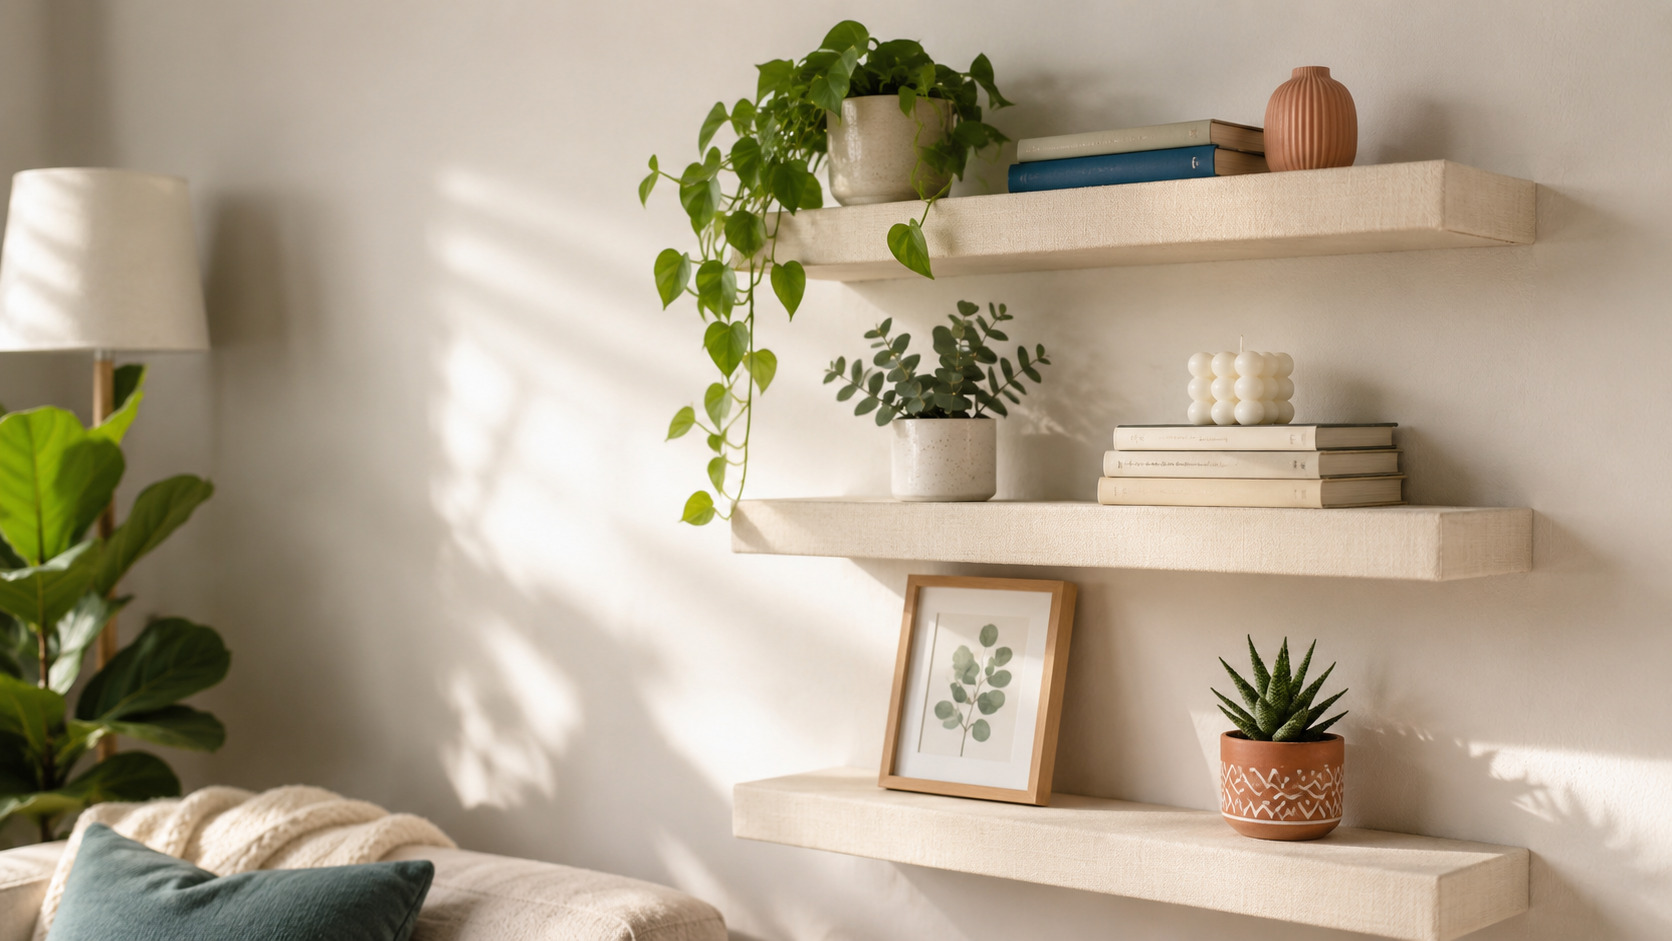
Who says beautiful home decor has to drain your wallet? If you’ve been scrolling Pinterest dreaming of those gorgeous floating shelves but cringing at the price tags, we have incredible news for you. With nothing more than cardboard boxes you probably already have lying around, a glue gun, and about an hour of your time, you can create stunning floating shelves that look like they came straight from a high-end home decor store.


This DIY cardboard floating shelf project is perfect for renters who want to personalize their space without major investments, students furnishing their first apartment, or anyone who loves the satisfaction of creating something beautiful from humble materials. The best part? These shelves are surprisingly sturdy, completely customizable, and cost a fraction of what you’d pay at a furniture store.
Save this tutorial for your next weekend DIY project and follow @theclutteredblog for more budget-friendly home decor ideas that actually look expensive.

Find the Right Floating Shelf Style for Your Space
Before you start cutting cardboard, let’s figure out which floating shelf design will work best for your home and skill level.
For absolute beginners: Start with a simple rectangular shelf in a neutral finish. This classic design requires minimal cutting precision and looks great in any room.
For small spaces: Create narrow, shallow shelves (6-8 inches deep) that don’t protrude too far from the wall. Perfect for displaying small plants, photos, or books without overwhelming the space.
For a luxury look: Cover your shelves with textured wallpaper or contact paper in marble, linen, or wood grain patterns. This instantly elevates the cardboard into something that looks like real wood or stone.
For maximal impact: Build a gallery wall of 3-5 shelves at varying heights and lengths. Mix and match sizes for visual interest and maximum display space.
For renters: Use removable adhesive strips or command hooks instead of drilling holes. Your shelves stay damage-free and your security deposit stays intact.

Why Cardboard Floating Shelves Are a Game-Changer
They Look Way More Expensive Than They Are
Let’s be honest—floating shelves from home decor stores can easily cost $30-$80 each, and that’s before you factor in mounting hardware. A set of three shelves could set you back $150 or more. But when you make them from cardboard, your total material cost is often under $10, especially if you already have boxes on hand.
The secret to making cardboard look expensive is all in the finishing. By covering your shelves with quality contact paper, wallpaper, or a smooth coat of paint, you completely hide the cardboard texture. Add some thoughtful styling with plants, books, and decorative objects, and nobody will ever guess your gorgeous shelves started life as an Amazon delivery box.
Perfect for Renters and Temporary Spaces
If you’re renting, you know the struggle: you want to make your space feel like home, but you can’t make permanent changes or invest heavily in furniture you’ll have to move. Cardboard floating shelves solve both problems beautifully.
They’re lightweight, easy to install with removable mounting options, and if they get damaged during a move? No big deal—you can make replacements in an afternoon. Plus, they’re customizable to fit any wall size or shape, which is perfect for awkward rental spaces with odd dimensions.
Eco-Friendly Upcycling at Its Finest
Every year, millions of tons of cardboard end up in landfills. By repurposing boxes into functional, beautiful home decor, you’re keeping waste out of the trash and reducing your environmental footprint. This project is especially meaningful if you’re trying to live more sustainably but feel limited by budget constraints.
It’s also a fantastic way to teach kids about upcycling and creativity. Get the whole family involved in collecting boxes, designing shelves, and decorating them together. You’ll create something useful while teaching valuable lessons about sustainability and resourcefulness.
Materials You’ll Need (Most You Already Have)
Essential Materials:
- Cardboard boxes (thick, double-walled works best—appliance boxes or moving boxes are ideal)
- Hot glue gun and plenty of glue sticks
- Sharp scissors or box cutter
- Wallpaper, contact paper, or decorative paper for covering
- Ruler or measuring tape
- Pencil for marking
For Mounting:
- Wall hangers with keyhole slots (2 per shelf)
- Screws and wall anchors (for permanent installation)
- OR removable adhesive strips/command hooks (for renter-friendly option)
- Level
- Drill (if using screws)
Optional Finishing Materials:
- Acrylic paint or spray paint
- Clear sealant or Mod Podge
- Sandpaper (for smoothing edges)
- Decorative trim or molding
Pro Tip: Don’t have a hot glue gun? Strong craft glue or wood glue works too, though you’ll need to clamp pieces together and wait longer for drying time.
Step-by-Step: Building Your Cardboard Floating Shelves
Step 1: Measure and Plan Your Design
Decide on your shelf dimensions before cutting anything. A good starting size for a beginner project is:
- Length: 18-24 inches
- Depth: 6-8 inches
- Height (front to back): 4-5 inches
Sketch your design with exact measurements. Remember: you’ll need pieces for the top, bottom, two sides, and a back panel. Mark all measurements clearly on your cardboard with a pencil.
Step 2: Cut Your Cardboard Pieces
Using your measurements, cut the following pieces:
- Top and bottom panels: Same length and depth (2 pieces)
- Side panels: Same depth and height (2 pieces)
- Back panel: Same length and height (1 piece)
Use a sharp box cutter and metal ruler for clean, straight cuts. Cut slowly and let the blade do the work—rushing leads to jagged edges that are harder to finish.
Step 3: Assemble the Box Shape
Start by attaching the side panels to the bottom panel using hot glue. Apply a generous bead of glue along the edge, press firmly, and hold for 30 seconds. Repeat with the top panel, then attach the back panel to close the box.
For extra strength, add cardboard strips along the inside corners as reinforcement. These act as internal brackets and prevent the shelf from warping under weight.
Step 4: Cover with Wallpaper or Contact Paper
This is where the magic happens! Measure your contact paper or wallpaper, leaving 1-2 inches of overlap on all sides. Start with the top surface, smoothing out bubbles as you go. Wrap the edges over the sides and secure with glue.
Work slowly and methodically—rushing leads to wrinkles and bubbles. If you do get bubbles, gently puncture them with a pin and smooth flat. Take your time here; this step makes or breaks the “expensive” look.
Step 5: Finish the Edges
Fold the excess paper neatly around all edges, mitering the corners like you’re wrapping a gift. Secure with glue and press firmly. For a professional finish, you can also add thin cardboard trim around the edges to hide any imperfect folds.
If you’re painting instead of using paper, sand any rough edges first, then apply 2-3 coats of paint for a smooth, uniform finish.
Step 6: Add Wall Hangers
Flip your shelf over and mark where you’ll attach the wall hangers. For a standard shelf, place them about 2-3 inches from each end. Use screws to attach the hangers securely to the cardboard, making sure they penetrate through to the back panel for maximum strength.
Reinforce the screw holes with extra cardboard layers or small wood blocks glued inside the shelf for added durability.
Step 7: Mount on Wall
Use a level to mark your mounting spots on the wall. If using screws and anchors, drill pilot holes first, then install anchors. Hang your shelf on the wall hangers and check that it’s level.
For a renter-friendly option, use heavy-duty removable adhesive strips rated for the weight your shelf will hold. Press firmly and wait the recommended time before loading the shelf.
Step 8: Decorate and Enjoy!
Now for the fun part—styling your new shelves! Here are some styling formulas that always look good:
The Rule of Three: Group items in odd numbers (3 or 5) for visual balance.
Mix Heights: Combine tall items (plants, vases) with shorter objects (books, candles) for visual interest.
Layer and Overlap: Place larger items in back, smaller items in front. Lean framed art against the wall behind other objects.
Add Life: Incorporate small plants (real or faux) for freshness and color.
Personal Touch: Mix in photos, travel souvenirs, or meaningful objects that tell your story.
Practical Tips for Long-Lasting Cardboard Shelves
Maximize Strength:
- Use double-walled or triple-walled cardboard for heavy-duty shelves
- Add internal cardboard ribs or cross-supports for extra rigidity
- Reinforce all joints with extra glue and cardboard strips
- Let glue dry completely (2-3 hours minimum) before mounting
Protect from Wear:
- Seal with 2-3 coats of clear Mod Podge or acrylic sealer
- Keep away from direct moisture and high humidity
- Dust regularly with a dry cloth
- Avoid placing in direct sunlight to prevent fading
Know the Limitations:
- Best for lightweight items: books, plants, photos, decorative objects
- Maximum weight per shelf: 5-10 pounds (depending on cardboard thickness)
- Not suitable for heavy items like large appliances or dense textbooks
- Replace if cardboard shows signs of warping or weakening
Budget Variations:
- $0 version: Use only materials you have at home
- Under $10: Buy just glue sticks and contact paper
- Under $20: Add paint, sealant, and decorative trim
Creative Variations to Try
Once you’ve mastered the basic floating shelf, experiment with these designs:
L-Shaped Corner Shelves: Create triangular shelves that fit into corners, maximizing unused space.
Tiered Display Ledge: Build shelves with a small front lip to prevent items from sliding off—perfect for displaying art or photos.
Hexagon Shelves: Cut hexagon-shaped shelves for a modern, geometric look that’s totally on-trend.
Shadow Box Style: Create deeper shelves (8-10 inches) with a back panel for displaying collectibles or creating mini vignettes.
Painted Ombré Effect: Paint your shelves in a gradient from light to dark for a custom, artistic touch.
Fabric-Wrapped Shelves: Cover shelves with fabric instead of paper for a soft, textured look.

Common Mistakes to Avoid
Using thin cardboard: Cereal box cardboard is too flimsy. Aim for moving boxes, appliance boxes, or furniture packaging with thick, corrugated layers.
Skipping the reinforcement: Internal supports and corner brackets double your shelf’s strength and lifespan. Don’t skip this step.
Rushing the covering: Wrinkles and bubbles in your contact paper are hard to fix once glued down. Work slowly and smooth as you go.
Overloading too soon: Wait at least 24 hours after mounting before placing heavy items on your shelves.
Poor weight distribution: Place heavier items near the wall (back of shelf) and lighter items toward the front to prevent tipping.
Ignoring wall type: Drywall needs anchors; plaster walls need special hooks. Research your wall type before mounting.
FAQ
How much weight can cardboard floating shelves hold?
A well-constructed cardboard floating shelf using double-walled cardboard and proper reinforcement can typically hold 5-10 pounds safely. This is enough for standard books, small plants, decorative objects, photo frames, and lightweight collectibles. The key factors are cardboard thickness, internal reinforcement, and mounting method. For heavier items, use triple-walled cardboard and add internal support ribs. Always test your shelf with gradual weight before fully loading it, and never exceed what feels stable.
How do I make cardboard shelves look like real wood?
The secret is in the finishing materials and technique. Use wood-grain contact paper or wallpaper for the most realistic look—apply it smoothly without bubbles for best results. Alternatively, paint your shelves with a base coat of tan or light brown, then use a darker brown paint applied with a dry brush technique to create wood grain texture. Finish with a clear satin or matte sealant to add depth and protect the surface. Adding small details like faux wood knots or edge banding can enhance the illusion even further.
Can I use cardboard floating shelves in a bathroom?
Cardboard shelves can work in bathrooms, but they require extra protection from moisture. Seal your shelves thoroughly with 3-4 coats of waterproof sealant like polyurethane or multiple layers of Mod Podge. Avoid placing them directly above the shower or in areas with high steam exposure. For better moisture resistance, consider using waxed cardboard or laminating the cardboard with contact paper on all surfaces, including edges. Even with protection, monitor your shelves regularly for signs of warping or weakening, and replace them if you notice any damage.
What’s the best way to mount cardboard shelves without damaging walls?
For renters or anyone who wants to avoid wall damage, heavy-duty removable adhesive strips are your best option. Use products like Command Strips rated for the weight your shelf will hold (check the packaging carefully). Clean the wall surface with rubbing alcohol before applying, press firmly for 30 seconds, and wait the recommended time (usually 1 hour) before hanging the shelf. For a more secure renter-friendly option, use removable adhesive hooks with wire hangers. Always follow the manufacturer’s weight limits and removal instructions to avoid damage.
How long do cardboard floating shelves last?
With proper construction and care, cardboard floating shelves can last 2-5 years or even longer. The lifespan depends on several factors: the quality and thickness of cardboard used, how well the shelves are sealed and protected, the environment they’re in, and the weight they regularly hold. Shelves kept in dry, climate-controlled rooms and sealed with quality finish last significantly longer than unsealed shelves in humid environments. If you notice warping, softening, sagging, or any structural weakness, it’s time to build replacements. The good news? You can always upgrade or refresh them with new contact paper or paint for a quick style update.
DIY cardboard floating shelves prove that beautiful, functional home decor doesn’t require a big budget or advanced skills. With just cardboard boxes, a glue gun, and some creativity, you can create custom shelves that look expensive and fit your space perfectly. Whether you’re decorating a rental, furnishing your first apartment, or just looking for a satisfying weekend project, these shelves deliver maximum impact with minimal investment.
Save this tutorial for your next DIY session, and don’t forget to follow @theclutteredblog for more creative ways to make your space beautiful without breaking the bank.