














Looking for budget-friendly ways to organize your home? You’re in the right place. Cardboard boxes are one of the most underrated organization tools—and they’re probably sitting in your recycling bin right now. Whether you’re dealing with a small apartment, tight budget, or just love sustainable DIY projects, these cardboard box organization ideas will transform how you store everything from office supplies to seasonal decor.
In this guide, you’ll discover 25 creative ways to turn ordinary shipping boxes, cereal boxes, and packaging materials into beautiful, functional storage solutions that actually look good in your home. No expensive containers required.
Quick Start: What You’ll Need
Essential Tools: Craft knife or strong scissors, ruler, packing tape, hot glue gun
Materials: Cardboard boxes (any size), fabric scraps or decorative paper, labels, optional rope or twine
Time: Most projects take 15-45 minutes
Best For: Renters, small spaces, budget organizers, craft enthusiasts, parents
Why Cardboard Box Organization Works
Cardboard box organization has exploded in popularity for good reason. It’s free (or nearly free), endlessly customizable, and surprisingly durable when reinforced properly. Unlike plastic bins that cost $10-30 each, cardboard lets you create custom-sized storage that fits your exact space without breaking the bank.
Plus, it’s perfect for renters who don’t want to invest in expensive organization systems they’ll have to move or leave behind. When you’re ready to refresh your system, you can simply recycle the old boxes and start fresh.
Best Cardboard Box Ideas by Room
Bedroom & Closet Organization
Transform your closet with stackable cardboard boxes that create custom shelving systems. Cover them in fabric that matches your decor for a cohesive look that rivals expensive closet organizers.
Home Office & Desk Storage
Cereal boxes and small shipping boxes make perfect desk organizers. Create custom compartments for pens, notebooks, cables, and supplies. The best part? You can resize them as your needs change.
Kids’ Rooms & Toy Storage
Kids outgrow toys faster than you can say “cleanup.” Cardboard boxes let you create labeled storage bins that are easy to replace, customize, and recycle when play preferences change.
Bathroom & Vanity Organization
Small cardboard boxes covered in waterproof contact paper or fabric create beautiful under-sink storage for toiletries, beauty products, and cleaning supplies.
Kitchen & Pantry Storage
Use sturdy cardboard boxes to organize pantry items, create drawer dividers for utensils, or build a custom spice rack. Just be sure to line them for food safety.
Practical Application: Making It Last
The biggest concern with cardboard organization is durability. Here’s how to make your DIY storage last:
- Reinforce edges with packing tape or decorative washi tape
- Cover with fabric or contact paper for moisture resistance
- Use double-wall cardboard for heavier items
- Avoid damp areas like under sinks without waterproof lining
- Replace seasonally if needed—it’s free, after all
Checklist: Before You Start
- Collect boxes in various sizes (shipping boxes, cereal boxes, shoe boxes)
- Clean and flatten boxes for storage until ready to use
- Measure your storage spaces (shelves, drawers, closets)
- Gather covering materials (fabric, wrapping paper, contact paper)
- Prepare tools: scissors, ruler, tape, glue
- Plan your labeling system (stickers, tags, washi tape)
- Choose a cohesive color scheme if visible
- Reinforce boxes that will hold heavy items
- Consider adding handles for pull-out storage
- Test fit before covering/decorating
- Line boxes for moisture-prone areas
- Create a mix of sizes for versatility
- Keep extra boxes for future projects
- Set up in well-ventilated area if using spray adhesive
- Allow drying time before loading items
FAQ
How do I make cardboard boxes look nice?
Cover boxes with fabric, decorative paper, or contact paper for an instant upgrade. Use washi tape to reinforce edges in a decorative way. Add labels, rope handles, or paint for a polished look. The key is choosing materials that match your existing decor.
How long do cardboard organizers last?
With proper reinforcement and covering, cardboard organizers can last 6 months to 2+ years. Boxes in dry areas with light use last longest. For high-moisture areas or heavy items, expect to replace them more frequently—but since they’re free, that’s part of the appeal.
Can cardboard boxes hold heavy items?
Yes, if you use double-wall cardboard and reinforce the bottom and edges with packing tape. For very heavy items like books, use smaller boxes to distribute weight. Stackable systems work best when boxes are uniform in size and well-reinforced.
Where can I get free cardboard boxes?
Check your own recycling first! Also ask at local stores (grocery, liquor, furniture), check Facebook Marketplace or Craigslist “free” sections, save Amazon and online order packaging, or ask neighbors who recently moved. Liquor stores often have sturdy divided boxes perfect for organizing.
How do I prevent cardboard from getting moldy?
Avoid using cardboard in damp areas without protection. Line boxes with plastic or waterproof contact paper for bathrooms and under-sink storage. Ensure good air circulation, don’t store wet items, and replace boxes at the first sign of moisture damage. For long-term storage in humid climates, consider sealed plastic bins instead.
Ready to see these ideas in action? Scroll through our visual gallery of 25 cardboard box organization projects that prove budget storage can be beautiful. Each one includes step-by-step inspiration and direct links to tutorials.
Beautiful Fabric-Covered Cardboard Storage Boxes

Source: Pinterest
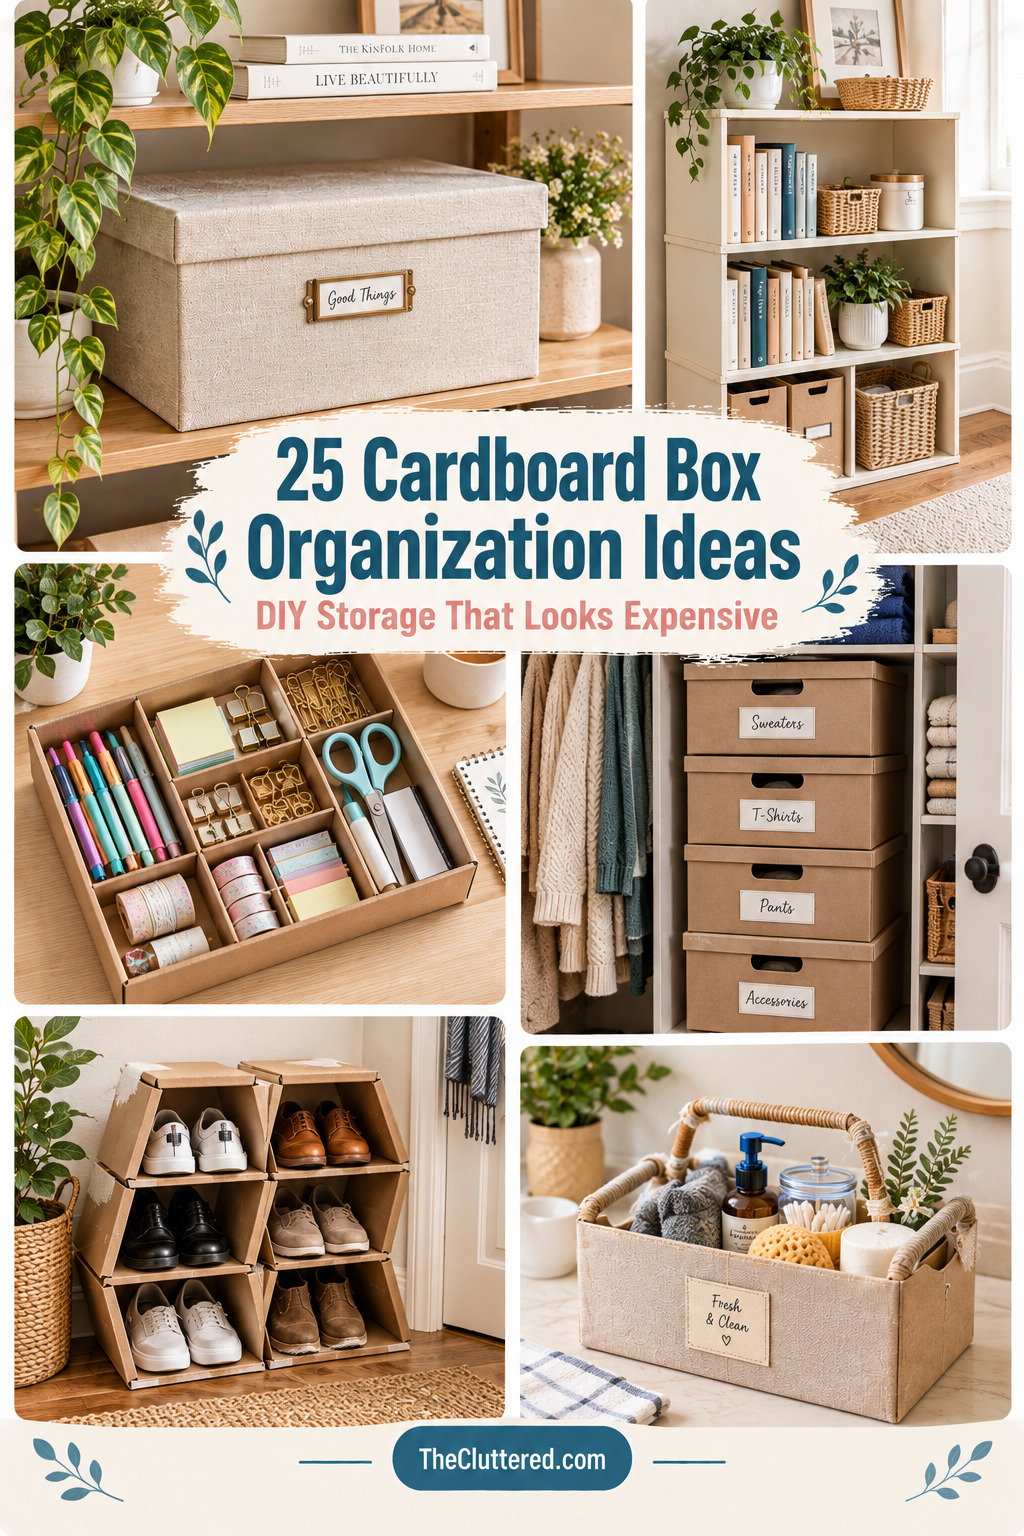
These fabric-covered cardboard boxes prove that budget storage can look expensive. The neutral fabric and rope handles create a cohesive, polished look that blends beautifully with any decor style. Perfect for storing everything from blankets to craft supplies.
What makes this idea so appealing is the transformation—from plain shipping box to styled storage solution. The fabric covering adds durability while the rope handles make boxes easy to pull from shelves. This is ideal for visible storage areas like open shelving, closets, or under-bed storage.
To recreate this, choose a sturdy cardboard box, measure and cut fabric with extra for folding inside, use spray adhesive or hot glue to attach, and wrap rope around box edges or create handles. Add a label for easy identification. The result looks store-bought but costs almost nothing.
DIY Cardboard Desk Organizer with Multiple Compartments

Source: Pinterest
This compact desk organizer maximizes vertical space while keeping supplies within easy reach. The tiered design creates separate compartments for pens, pencils, scissors, and small items—no more digging through junk drawers.
What’s brilliant about this design is how it uses cardboard’s natural strength. The vertical compartments provide structure while the open design keeps everything visible. It’s perfect for students, home offices, or craft rooms where you need quick access to supplies.
Build this using cereal boxes or cut cardboard to create dividers. Arrange boxes at different heights, glue together, then cover with decorative paper or paint. Customize compartment sizes based on what you store most. Add a non-slip pad underneath to prevent sliding.
Triangular Cardboard Shoe Rack

Source: Pinterest
This triangular shoe rack is a game-changer for small entryways. By cutting cardboard boxes into triangular shapes and stacking them, you create individual shoe compartments that maximize vertical space while keeping pairs organized and visible.
The triangular design is genius—it’s stable, space-efficient, and each “pocket” holds one pair perfectly. Unlike flat stacking, this keeps shoes from getting crushed and makes it easy to grab what you need. It’s ideal for apartments, dorms, or anyone with limited closet space.
To build this, use sturdy cardboard boxes, cut them at an angle to create triangles, reinforce edges with tape, and stack in a pyramid formation. Cover with contact paper or fabric for durability. You can customize the size based on your shoe collection and available space.
Custom Cardboard Drawer Dividers

Source: Pinterest
Drawer dividers don’t need to cost $30+ at the store. Cut cardboard to fit your exact drawer dimensions and create custom compartments for utensils, office supplies, socks, or jewelry. The beauty is in the customization—you design it for your specific needs.
This works because you can adjust divider height, width, and placement to match what you’re storing. Tall dividers for spatulas, shallow ones for pens, narrow slots for jewelry. Unlike pre-made organizers, cardboard lets you create the perfect fit without wasting space.
Measure your drawer, cut cardboard strips to create a grid pattern, and use slotted cuts to interlock pieces without glue (or hot glue for permanence). Cover with contact paper for easy cleaning. When your needs change, just make new dividers—it’s free!
Stackable Cardboard Box Shelving System

Source: Pinterest
This modular shelving system transforms uniform cardboard boxes into a cohesive closet organization solution. By covering boxes in matching paper or fabric and stacking them strategically, you create custom cubbies that maximize every inch of closet space.
The modular approach is perfect because it’s flexible. Need more space for sweaters? Rearrange the boxes. Want to add shoe storage? Swap in different sizes. Unlike fixed shelving, this system grows and changes with your needs.
Start with sturdy boxes in similar sizes, reinforce all edges with packing tape, cover with coordinating paper or fabric for a polished look, and stack based on what you store most. Add labels or baskets inside for extra organization. The uniform appearance makes it look intentional, not makeshift.
Cardboard Book Display Shelf

Source: Pinterest
This face-forward bookshelf is perfect for kids’ rooms. By cutting cardboard boxes at an angle and stacking them, you create shelves that display book covers instead of spines—making it easier for children to choose their favorite stories and encouraging independent reading.
The design is both practical and developmental. Young readers who can’t read titles yet can recognize books by their covers. The open, accessible design promotes independence while the low height is perfect for small hands. Plus, it’s sturdy enough for daily use.
Build this using large cardboard boxes, cut at a slight angle to create ledges, stack and secure with strong tape or glue, then cover with bright paper or washi tape. Mount to wall for safety or keep freestanding. Customize the number of shelves based on your book collection.
Rope-Wrapped Cardboard Storage Basket

Source: Pinterest
This rope-wrapped basket proves cardboard can look high-end. By wrapping a cardboard box with jute or cotton rope and adding a fabric liner, you create a storage solution that rivals $40+ store-bought baskets. It’s perfect for blankets, toys, or bathroom essentials.
The rope adds texture and durability while completely hiding the cardboard underneath. The fabric liner makes it easy to clean and adds a pop of color or pattern. This works beautifully in any room where you want storage to be part of the decor.
To make this, start with a sturdy box, apply hot glue in sections, wrap rope tightly from bottom to top, and add a fabric liner that folds over the edge. Create rope handles if desired. The result is a beautiful, functional piece that no one will guess cost less than $5.
Low-Profile Under-Bed Storage Boxes

Source: Pinterest
Under-bed storage is prime real estate in small spaces. By cutting down cardboard boxes to the perfect height and adding lids, you create custom storage for off-season clothes, extra linens, or memorabilia—without spending $50+ on plastic bins.
The custom sizing is key here. Measure your under-bed clearance and cut boxes to fit perfectly. This maximizes space while keeping items dust-free and organized. Add wheels or handles for easy access, and label clearly so you know what’s inside without pulling everything out.
Use flat boxes or cut down taller ones, reinforce bottoms with extra cardboard layers, create separate lids that fit snugly, and cover with decorative paper or fabric. Add rope handles for easy pulling. This is ideal for seasonal rotation—swap summer and winter clothes without cluttering your closet.
Labeled Cardboard Pantry Organization Bins

Source: Pinterest
These labeled cardboard bins transform chaotic pantries into organized systems. By using uniform boxes covered in kraft paper or contact paper and adding clear labels, you create categories for snacks, baking supplies, canned goods, or breakfast items.
The labeling system is what makes this work long-term. When everything has a designated home, it’s easier to see what you’re running low on and maintain order. The uniform appearance makes the pantry look intentional and calm, not cluttered.
Line boxes with wax paper or plastic for food safety, use clear bins for items you want to see, add chalkboard labels or printed tags for easy updating, and group similar items together. This system works especially well for deep shelves where items get lost in the back.
Cardboard Craft Supply Caddy with Handles

Source: Pinterest
This portable craft caddy keeps supplies organized and easy to transport. By dividing a cardboard box into compartments and adding sturdy handles, you create a mobile workstation perfect for scrapbooking, sewing, or kids’ art projects.
The portability factor is huge—you can move your entire craft station from room to room or pack it up when guests come over. The compartments keep small items from getting lost while the handles make it easy to grab and go.
Use a sturdy box, create dividers from cardboard strips, reinforce handles with extra tape or rope, and cover with decorative paper. Add small containers inside for tiny items like buttons or beads. This is perfect for shared spaces where you need to clear the table quickly.
Vertical Cardboard File & Magazine Organizer

Source: Pinterest
These vertical organizers solve the paper clutter problem beautifully. By cutting cereal boxes or small shipping boxes at an angle, you create perfect holders for magazines, files, catalogs, or craft paper that keep everything upright and accessible.
The vertical design maximizes desk or shelf space while keeping items visible and easy to grab. No more digging through piles or having papers topple over. This works for home offices, craft rooms, or kids’ homework stations.
Cut boxes diagonally to create the angled front, cover with decorative paper or washi tape, label each one by category, and arrange side-by-side for a cohesive look. You can also stack them for multi-level storage. Customize the angle based on what you’re storing—shallow for magazines, deeper for files.
Waterproof Cardboard Bathroom Storage

Source: Pinterest
Bathroom storage doesn’t have to mean expensive plastic bins. Line cardboard boxes with waterproof contact paper or plastic wrap, and you create durable storage for toiletries, cleaning supplies, or extra towels that can handle humidity.
The lining is crucial—it protects the cardboard from moisture while creating a wipeable surface. This makes cardboard viable for bathrooms, which are typically too damp for untreated boxes. It’s budget-friendly and customizable to fit your exact under-sink space.
Choose sturdy boxes, line completely with waterproof material (contact paper works best), fold edges neatly and secure with clear tape, and add dividers if needed. Cover the outside with coordinating paper for a finished look. Replace when signs of wear appear—it’s still cheaper than buying new plastic bins.
Cardboard Jewelry Organizer with Compartments

Source: Pinterest
This compartmentalized jewelry organizer keeps tiny accessories tangle-free and visible. By dividing a shallow box into sections and lining with soft fabric or felt, you create dedicated spots for earrings, rings, bracelets, and necklaces.
The soft lining protects delicate jewelry while the compartments prevent tangling and make it easy to see everything at once. No more digging through jewelry boxes or untangling necklaces. This works beautifully on dressers or in drawers.
Use a shallow box, create dividers from cardboard or foam board, line with velvet, felt, or soft fabric, and add hooks or pegs for hanging necklaces. Cover the outside with decorative paper or fabric. For extra organization, use small beads or buttons as earring holders by poking them through fabric.
Colorful Cardboard Toy Storage Bins

Source: Pinterest
Kids’ toys multiply faster than anything else, but these colorful cardboard bins make cleanup easy and affordable. Cover boxes in bright paper or let kids decorate them, then use picture labels so even non-readers know where things go.
The beauty of cardboard for kids’ rooms is the replaceability. When bins get worn, torn, or outgrown, you can recycle them and make new ones for free. Involve kids in decorating their bins—it increases the likelihood they’ll actually use them.
Use sturdy boxes in various sizes, cover with contact paper or let kids decorate with paint/stickers, add picture labels (cars for toy cars, blocks for blocks), and keep at kid-height for easy access. Create a bin for each category and rotate toys seasonally to keep things fresh.
Cardboard Cable Management Box

Source: Pinterest
Cable clutter is the enemy of a clean desk. This simple cardboard box solution hides power strips, chargers, and tangled cords while keeping everything accessible. Cut slots for cables to exit, cover decoratively, and instantly upgrade your workspace.
This works because it addresses both function and aesthetics. The box conceals the ugly mess while the slots keep cords organized and prevent tangling. It’s especially useful for home offices where you want a professional appearance on video calls.
Use a box large enough for your power strip, cut holes or slots for cables, reinforce edges, cover with decorative paper or fabric, and label cord exits if needed. Add ventilation holes if storing devices that generate heat. This instantly makes any desk look more polished.
Cardboard Closet Shoe Organizer

Source: Pinterest
Shoes take up massive closet space, but cardboard organizers solve this elegantly. By creating individual compartments or using boxes as dividers, you can store more shoes vertically while keeping pairs together and visible.
This system works because it uses vertical space efficiently and keeps shoes from toppling over. You can see every pair at a glance, making it easier to choose outfits. It’s also gentle on shoes—no crushing or scuffing like when they’re piled up.
Use uniform boxes for a cohesive look, cut some in half to create dividers, label with shoe type or owner’s name, and arrange by frequency of use. Add silica gel packets to absorb moisture. This is perfect for sneaker collections, work shoes, or kids’ ever-growing shoe sizes.
Cardboard Seasonal Decor Storage

Source: Pinterest
Seasonal decor takes up space 11 months of the year, so smart storage is essential. Cardboard boxes are perfect for this—store Christmas ornaments, Halloween decorations, or summer accessories in clearly labeled boxes that stack neatly in closets or attics.
The labeling system is crucial here. When you can quickly identify what’s in each box, you won’t dread the seasonal swap. Use clear labels like “Christmas Tree Ornaments,” “Halloween Yard Decor,” or “Summer Patio Accessories” for instant recognition.
Use sturdy boxes for heavy items, wrap fragile ornaments in tissue paper, add padding between delicate items, label clearly on multiple sides, and store similar items together. Consider color-coding labels by season. This system makes decorating for holidays faster and less stressful.
Cardboard Makeup & Beauty Organizer

Source: Pinterest
Keep your beauty collection organized with this compartmentalized cardboard organizer. Create custom sections for lipsticks, brushes, palettes, and skincare products. Cover in pretty paper or fabric to match your vanity aesthetic.
The customization is key—unlike one-size-fits-all plastic organizers, you can create compartments that fit your specific collection. Tall sections for brushes, shallow ones for palettes, small squares for lipsticks. It’s designed for how you actually use your products.
Use shallow boxes, create dividers at varying heights, line with wipeable material for easy cleaning, and arrange by product type or frequency of use. Add a mirror to the inside lid if creating a travel version. This keeps your vanity clutter-free and makes getting ready faster.
Cardboard Kitchen Utensil Drawer Organizer

Source: Pinterest
Kitchen drawers are notorious for becoming junk drawers, but custom cardboard dividers solve this. Create sections for spatulas, whisks, measuring cups, and gadgets so everything has a designated home and stays organized.
The custom fit is what makes this superior to store-bought organizers. Measure your drawer exactly and create compartments that maximize every inch. No wasted space, no items rattling around. Plus, when you get new gadgets, just adjust the dividers.
Measure your drawer precisely, cut cardboard strips to create a grid, use interlocking slots or hot glue to secure, and line with contact paper for easy wiping. Create taller sections for tall utensils, shallow ones for flat items. Label sections if helpful. This transforms chaotic drawers in under 30 minutes.
Wall-Mounted Cardboard Box Shelves

Source: Pinterest
These wall-mounted cardboard boxes create floating shelf effects without the cost or commitment. Cover boxes in coordinating paper or paint, mount securely to walls, and use them to display books, plants, or decorative items.
This works surprisingly well for lightweight items. The box shape creates natural depth for displaying items, and you can arrange them in creative patterns—stacked, staggered, or in geometric designs. It’s perfect for renters who can’t install traditional shelving.
Use very sturdy double-wall cardboard, reinforce all edges heavily with packing tape, cover decoratively, mount with heavy-duty picture hangers or brackets, and only store lightweight items. Test weight capacity carefully. This is best for books, small plants, or decorative objects—not heavy collections.
Cardboard Gift Wrap Storage Organizer

Source: Pinterest
Gift wrap, ribbons, and bags always end up scattered until you create a dedicated storage solution. This tall cardboard organizer keeps everything upright and together—rolls stand vertically, ribbons have compartments, and bags stack neatly.
The vertical storage is genius for wrapping paper rolls, which are awkward to store flat. By keeping them upright in a tall box, they stay crisp and uncrushed. Add dividers for different roll sizes and compartments for accessories, and you’ll never hunt for tape again.
Use a tall sturdy box, create sections with cardboard dividers, add a ribbon spool holder from a dowel, include a small tray for tape and scissors, and label sections clearly. Store in a closet or craft room. This makes gift wrapping faster and less stressful during busy seasons.
Cardboard Snack Station for Kids

Source: Pinterest
This kid-accessible snack station promotes independence while keeping healthy options organized. Use shallow cardboard boxes to create compartments for different snack categories—fruits, granola bars, crackers—placed at kid-height in the pantry or fridge.
When kids can see and reach their snacks easily, they’re more likely to choose healthy options and less likely to ask you constantly. The compartments teach organization while the accessibility builds confidence. It’s a win-win for busy parents.
Line boxes with washable material, use clear bins or open boxes for visibility, label with pictures for non-readers, place at appropriate height, and restock together with kids. Rotate snacks weekly to keep things interesting. This reduces “I’m hungry” interruptions and teaches healthy habits.
Cardboard File Organizer System

Source: Pinterest
Paper clutter is real, but cardboard file organizers keep documents sorted and accessible. Create vertical compartments for different categories—bills, receipts, important documents, projects—so nothing gets lost in a pile.
The vertical design makes it easy to flip through files and find what you need quickly. Unlike horizontal stacking where bottom papers get forgotten, everything stays visible. Label clearly and you’ll never waste time searching for important documents again.
Use sturdy boxes, create dividers with hanging file folders or cardboard strips, label each section clearly, and arrange by frequency of use or category. Add a shredding bin nearby for easy disposal. This system works for home offices, student papers, or small business records.
Cardboard Laundry Sorting System

Source: Pinterest
Laundry day is easier when clothes are pre-sorted. Create a three-box system for lights, darks, and delicates using sturdy cardboard boxes. Place them in bedrooms or bathrooms so family members can sort as they undress.
This simple system saves time and prevents color disasters. When everyone sorts as they go, laundry day becomes faster and more efficient. The boxes can be decorated to match your space or kept simple—function over form for this utility item.
Use large sturdy boxes, reinforce bottoms well, line with plastic bags for moisture protection, label clearly with “Lights,” “Darks,” “Delicates,” and place in convenient locations. Empty into laundry room when full. This small habit change makes a huge difference in laundry efficiency.
Modular Cardboard Cube Storage System

Source: Pinterest
This modular cube system is the ultimate in flexible organization. Create uniform cardboard boxes that can be stacked, arranged, and rearranged as your needs change. Use them as shelves, drawers, or display units depending on your current needs.
The modularity is what makes this special. Unlike fixed furniture, you can reconfigure these cubes whenever you move, redecorate, or your storage needs evolve. Cover them uniformly for a cohesive look or mix patterns for visual interest.
Make all boxes the same size for maximum flexibility, reinforce heavily for stacking strength, cover with matching paper or fabric, add casters for mobility if desired, and arrange based on current needs. Use some open, some with lids, some with dividers inside. This system grows with you.
Love these ideas? Follow @theclutteredblog on Pinterest for more cozy, practical gift inspiration!