









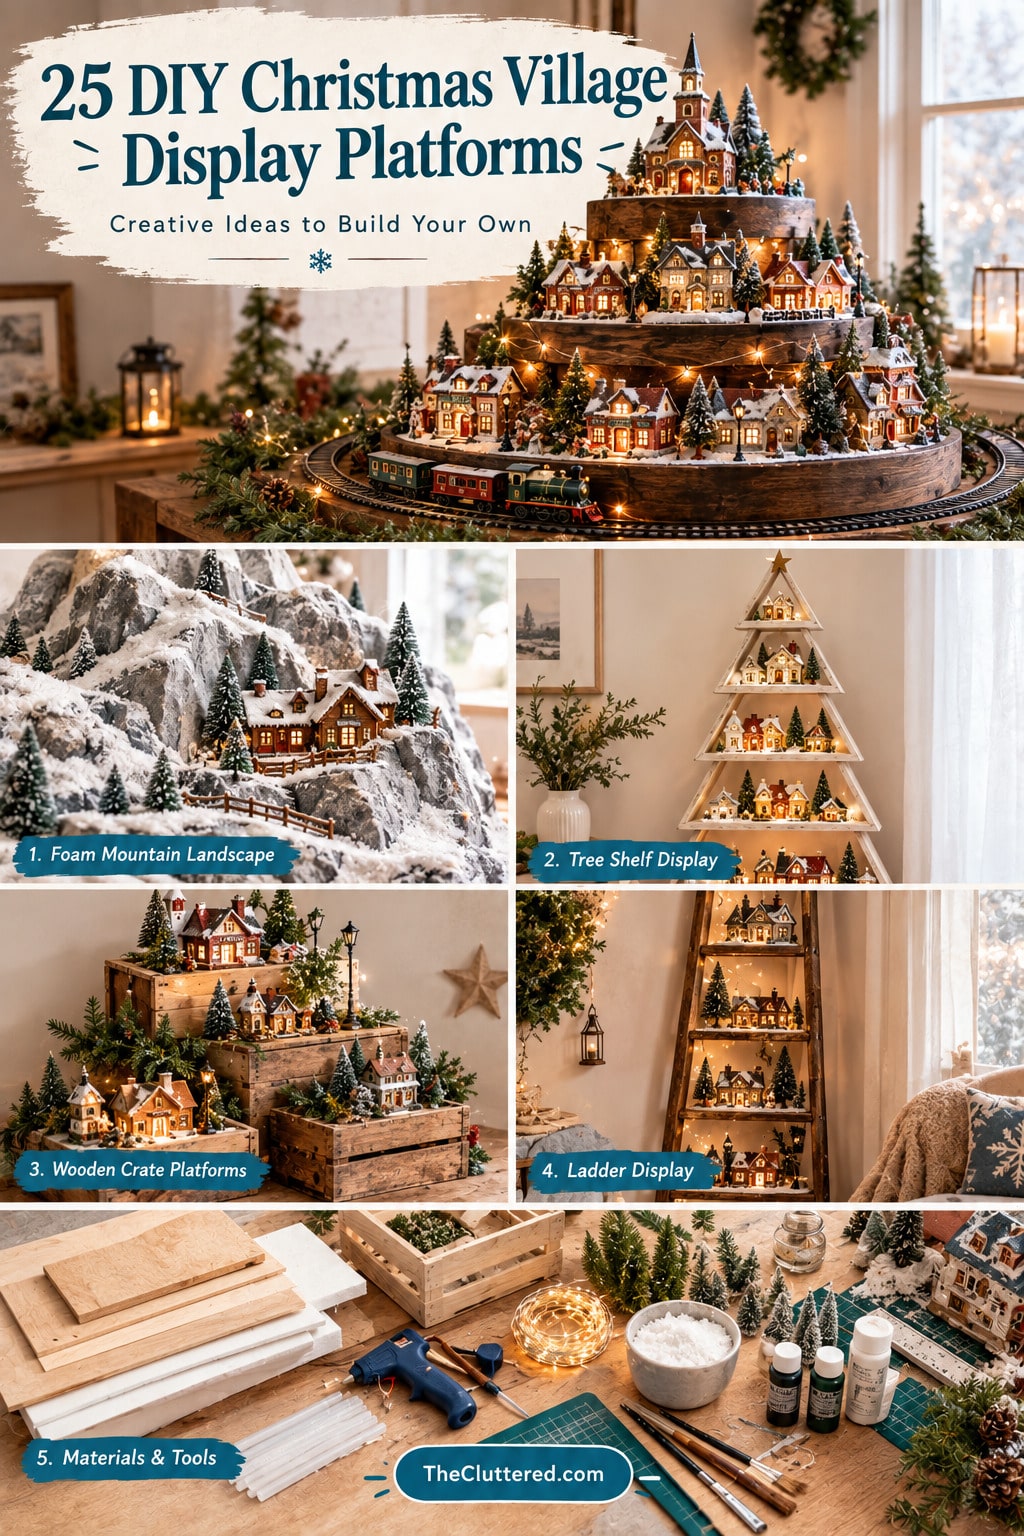


Creating a Christmas village display that captures the magic of the season doesn’t require expensive pre-made platforms or professional carpentry skills. Whether you’re working with Department 56 houses, Lemax villages, or a charming collection of miniature buildings, the right DIY display platform transforms your collection from flat and forgettable into a dimensional winter wonderland.
This guide walks you through 25 creative approaches to building custom Christmas village display platforms—from budget-friendly cardboard solutions to elaborate multi-tiered wooden stands. You’ll discover how to maximize small spaces, create realistic landscapes with foam and everyday materials, and design displays that make setup and storage effortless year after year.
Quick Start: Choose Your Platform Style
Before diving into construction, consider which approach fits your space, budget, and skill level:
Best for Small Spaces
- Corner ladder displays – Vertical storage that fits tight corners
- Wall-mounted shelves – Frees up floor and table space
- Tree-shaped tiered stands – Narrow footprint with maximum display area
Best for Budget Builders
- Cardbox box platforms – Free or nearly free materials
- Foam board risers – Inexpensive and easy to cut
- Repurposed furniture – Use what you already own
Best for Realistic Landscapes
- Hot wire foam carving – Create mountains, hills, and valleys
- Plywood base with layers – Sturdy foundation for elaborate scenes
- Modular platform systems – Mix and match different elevations
Essential Materials for DIY Village Platforms
The beauty of DIY Christmas village displays is that you can work with materials ranging from free household items to professional-grade supplies. Here’s what you’ll commonly use:
Base Materials
- Plywood or MDF – Sturdy foundation for permanent displays
- Foam board or insulation foam – Lightweight and easy to carve
- Cardboard – Perfect for temporary or budget displays
- Wooden crates or boxes – Instant tiered levels
Support & Structure
- 1×2 or 1×3 lumber for framing
- Wood screws and wood glue
- Corner brackets for stability
- Wood stain or paint for finishing
Landscaping & Details
- Faux snow or cotton batting
- Green moss or turf for grass
- Small rocks and gravel for roads
- Miniature trees and accessories
- LED string lights or battery-operated tea lights
Planning Your Multi-Level Display
The secret to a captivating Christmas village isn’t just the houses themselves—it’s creating depth and visual interest through multiple levels. Think of your display like a stage set: the foreground draws viewers in, the middle ground tells the story, and the background creates atmosphere.
Key Planning Considerations
| Factor | Questions to Ask | Impact on Design |
|---|---|---|
| Available Space | Table, floor, corner, or wall? | Determines footprint and orientation |
| Village Size | How many buildings? | Affects platform dimensions and levels needed |
| Storage | Permanent or seasonal setup? | Influences portability and assembly method |
| Budget | What can you spend? | Guides material selection |
| Skill Level | Comfortable with tools? | Determines construction complexity |
Height and Depth Guidelines
For most village displays, aim for these proportions:
- Platform depth: 18-24 inches minimum to accommodate buildings and landscaping
- Level height difference: 3-6 inches between tiers for comfortable viewing
- Total height: Keep the highest point at or below eye level when seated for best viewing
- Building spacing: Allow 2-3 inches between structures for visual breathing room
Building Techniques That Make a Difference
Creating Realistic Terrain with Foam
Extruded polystyrene (XPS) foam or insulation board is the secret weapon of serious village builders. Unlike styrofoam beads that crumble, XPS foam cuts cleanly and holds detail beautifully.
“The key to realistic foam landscapes is layering. Build up your terrain in 1-2 inch layers, carving each level before adding the next. This creates natural-looking slopes and prevents the ‘stacked box’ appearance.”
Basic foam carving process:
- Sketch your landscape design on paper first
- Cut foam layers to rough shape with a utility knife
- Use a hot wire cutter or serrated knife for smooth slopes
- Carve riverbeds, roads, and texture details
- Seal with white glue or foam-safe primer
- Paint with acrylics and add landscaping
Woodworking for Sturdy Platforms
If you’re building a permanent or semi-permanent display, wood provides unmatched stability. Simple butt joints with wood glue and screws create strong platforms that last for years.
Pro tips for wooden platforms:
- Use 3/4″ plywood for the main platform surface
- Build a simple frame underneath with 1×3 or 1×4 lumber
- Add cross-bracing every 18-24 inches to prevent sagging
- Pre-drill screw holes to prevent wood splitting
- Sand edges smooth and finish with stain or paint
- Consider adding felt pads to protect furniture
Quick and Easy Cardboard Solutions
Don’t underestimate cardboard for temporary displays or when testing layouts. Cereal boxes, shipping boxes, and gift boxes can all become instant risers.
Cover cardboard with wrapping paper, fabric, or paint to create attractive platforms in minutes. The lightweight nature makes rearranging your village effortless, and you can easily adjust heights by stacking multiple layers.
Lighting and Electrical Considerations
One of the biggest challenges in village displays is managing cords and power sources. Plan your lighting strategy before building your platform:
Power Options
- Battery-operated LED lights – No cords, but require battery access
- Plug-in string lights – Reliable power but visible cords
- USB-powered lights – Can use phone chargers or power banks
- Combination approach – Mix battery and plug-in for flexibility
Cord Management Strategies
- Drill holes in platforms to route cords underneath
- Build a false bottom with space for wiring
- Use cord covers painted to match your landscape
- Hide power strips behind buildings or scenery
- Consider a central power hub with extensions to each section
Space-Saving Solutions for Small Homes
Limited space doesn’t mean you have to skip the Christmas village. These strategies maximize display impact in minimal square footage:
Vertical Display Ideas
- Corner ladder display: A decorative ladder in the corner creates natural tiers
- Wall shelves: Floating shelves at varying heights create a village “skyline”
- Bookcase conversion: Dedicate one bookshelf to your village, using books as risers
- Over-mantel shelving: Utilize wall space above your fireplace
Multi-Purpose Furniture
- Use your coffee table with a removable platform insert
- Convert a sideboard or buffet into a village showcase
- Place a platform on top of a storage ottoman
- Utilize window seats with built-in storage underneath
Storage and Portability Tips
A great display platform is only useful if you can store it easily and set it up year after year without frustration.
Design for Disassembly
- Use bolts instead of permanent screws for major connections
- Create modular sections that stack or nest
- Label each piece for easy reassembly
- Keep all hardware in labeled bags
- Photograph the assembled display for reference
Protection During Storage
- Wrap platforms in moving blankets or bubble wrap
- Store in climate-controlled areas to prevent warping
- Keep landscaping materials in sealed containers
- Remove batteries from all lights before storing
- Document your layout with photos for next year
Checklist: Building Your Christmas Village Platform
- Measure your available display space (length, width, height)
- Count your village buildings and accessories
- Sketch a rough layout showing building placement
- Determine number of levels needed (minimum 2-3 for visual interest)
- Select base material (plywood, foam, cardboard, etc.)
- Gather support materials (lumber, brackets, screws)
- Plan lighting strategy and power source locations
- Choose finish (paint, stain, or cover material)
- Purchase landscaping supplies (snow, moss, rocks, trees)
- Test fit buildings on platform before final assembly
- Create cord management system (holes, channels, or covers)
- Add safety features (stable base, non-slip pads)
- Label sections if designing for disassembly
- Take photos of completed setup for future reference
- Plan storage solution for off-season
Frequently Asked Questions
What’s the cheapest way to build a Christmas village display platform?
Cardboard boxes and foam board from dollar stores offer the most budget-friendly option. You can create impressive multi-level displays using cereal boxes, shipping boxes, and gift boxes as risers. Cover them with wrapping paper, fabric scraps, or paint for a polished look. Total cost can be under $20 if you repurpose materials you already have.
How do I make my village display look more realistic?
Realism comes from layering and attention to detail. Create varied elevations rather than flat tiers, add landscaping like faux snow, moss, and miniature trees, incorporate lighting at different heights, and arrange buildings in logical groupings (houses near a church, shops along a “main street”). Use materials like fine gravel for roads, cotton batting for snowdrifts, and green turf for grass areas.
Can I build a village platform without woodworking skills?
Absolutely! Foam board, cardboard, and pre-made wooden crates require no advanced skills. You can also repurpose furniture like bookcases, ladders, or tiered plant stands. Many craft stores sell pre-cut wooden shapes and platforms that just need assembly with glue. The key is choosing materials that match your comfort level.
How do I prevent my village buildings from sliding off elevated platforms?
Add small stops or lips along the edges of each level using thin strips of wood, cardboard, or foam. You can also use museum putty, adhesive dots, or double-sided tape to secure buildings temporarily. Another option is creating “building pads” with non-slip shelf liner cut to fit under each structure.
What’s the best way to hide electrical cords in my display?
Drill holes through your platform at strategic locations and route cords underneath. Build a false bottom with 1-2 inches of clearance for wiring. Use cord covers painted to match your landscape, or hide cords behind buildings, trees, and scenery elements. Battery-operated LED lights eliminate cords entirely but require battery access for changes.
Ready to Build Your Dream Village?
The perfect Christmas village display platform isn’t about expensive materials or professional carpentry—it’s about creating a showcase that brings your collection to life. Whether you choose simple cardboard risers, carved foam landscapes, or an elaborate wooden tree stand, the most important element is the joy it brings to your holiday season.
Start with one idea that matches your current skill level and budget. As you gain confidence, you can expand, modify, or completely reimagine your display. Many village enthusiasts spend years refining their setups, adding new techniques and features each season. The beauty of DIY is that your platform evolves along with your collection and your creativity.
Remember: the goal isn’t perfection—it’s creating a magical centerpiece that makes your home feel warm and festive. Your village display becomes more than decoration; it becomes a tradition, a conversation piece, and a source of holiday joy for years to come.
Rustic Dark Wood Tiered Tower with Train Track

Source: Etsy – BlackCatPlan
This stunning tiered Christmas village display combines deep walnut-stained wood with warm fairy lights and a classic model train track at the base, creating a holiday centerpiece that looks professionally designed. The rich, rustic aesthetic makes it feel like a designer home feature rather than a DIY project.
The tiered tower design maximizes vertical space while showcasing multiple village buildings at different heights. The integrated train track adds movement and nostalgia, making the display interactive and engaging for viewers of all ages.
You can customize the stain to match your home’s existing decor—choose light oak, walnut, or weathered grey. This is a one-time build that you’ll treasure for decades, perfect for Department 56, Lemax, and all village collections. The flat-pack design disassembles for easy storage after the holidays.
Simple DIY Platforms Adding Depth and Dimension

Source: Pinterest – My Garbage Collection
This straightforward approach to village displays focuses on the fundamental principle that makes any collection more interesting: elevation. By creating simple platforms at varying heights, you instantly transform a flat arrangement into a dynamic, three-dimensional scene.
The beauty of this method is its accessibility. You don’t need advanced woodworking skills or expensive materials. Basic lumber, foam board, or even sturdy cardboard can create the levels needed to showcase your village buildings effectively.
Start by identifying your focal point buildings and placing them on the highest platforms. Arrange supporting structures at middle levels, and use the lowest tier for landscape elements, roads, and smaller accessories. This creates a natural visual flow that guides the viewer’s eye through your entire display.
5-Tier Christmas Tree Stand with Village Scenes

Source: Etsy – BlackCatPlan
This clever design transforms the traditional Christmas tree shape into a functional display platform. The 5-tier wooden stand creates a narrow footprint perfect for small spaces while providing ample room for multiple village buildings, snowy scenes, and festive lighting.
The tree-shaped design isn’t just decorative—it’s practical. Each tier gets progressively smaller as it rises, creating natural sight lines so every building is visible. The vertical orientation means you can create an impressive display even in tight corners or narrow spaces.
Download the plans to build this yourself, or use the concept as inspiration for your own variation. You can adjust the number of tiers, the overall height, and the finishing style to match your space and skill level. Add battery-operated fairy lights between tiers for extra magic.
Assembled Paper Houses with LED Glow

Source: Etsy – Chaiv Design
These intricate paper buildings create a magical glowing village perfect for mantels or dining tables. Cut using Cricut SVG files, the houses assemble into a beautiful winter centerpiece where warm LED lights shine through the windows for the coziest holiday atmosphere.
This approach is perfect for crafters who love detailed paper projects and elegant holiday décor. The paper houses are lightweight, making them easy to arrange and rearrange on any surface without worrying about heavy platforms or structural support.
Pair these with woodland trees for a complete winter wonderland display. The SVG files are available for download, allowing you to create as many houses as you need. This is an excellent option for renters or those who need portable, lightweight displays that store flat.
Knock-Down Tiered Table for Easy Storage

Source: LumberJocks
This practical design solves one of the biggest challenges of Christmas village displays: storage. The knock-down tiered table assembles quickly each holiday season and disassembles flat for compact off-season storage, making it ideal for those with limited space.
The tiered design provides multiple levels for showcasing buildings while the knock-down construction uses simple hardware like bolts or cam locks instead of permanent screws. This means you can take it apart completely without damaging the wood.
Build this once and enjoy it for years. The sturdy construction supports heavy buildings and decorations, while the thoughtful design makes annual setup a breeze rather than a chore. Perfect for families who want a professional-looking display without the permanent footprint.
Styrofoam Transformation into Village Landscape

Source: Instagram – Villages of All Seasons
This dramatic before-and-after shows the incredible potential of foam carving for village displays. What starts as plain styrofoam transforms into a stunning landscape with mountains, valleys, and realistic terrain that makes miniature buildings look like they belong in a real winter scene.
Foam carving allows you to create organic, natural-looking landscapes rather than geometric tiers. You can sculpt hills, carve riverbeds, create caves, and build mountain backdrops that add incredible depth and realism to your village.
The process involves cutting foam with hot wire tools or serrated knives, sealing with white glue, painting with acrylics, and adding landscaping materials like faux snow, moss, and miniature trees. This technique takes more time than simple platforms but creates museum-quality results.
Lefton Village Display in Wooden Crates

Source: Pinterest
Wooden crates create instant tiered platforms with built-in rustic charm. This approach requires zero construction skills—simply arrange crates at different heights and orientations to create an attractive, multi-level display that feels both organized and casually charming.
The natural wood tones and weathered appearance complement traditional Christmas villages beautifully. Crates are also functional beyond the display—they can store village accessories year-round, then flip over to become the platform itself during the holidays.
Find crates at craft stores, flea markets, or even ask at your local grocery store for produce crates. Paint or stain them for a coordinated look, or embrace the eclectic mix of different wood tones for a collected-over-time aesthetic.
DIY Ladder Christmas Tree Village Display

Source: Pinterest
A decorative ladder becomes an instant tiered display platform, perfect for corners or against walls. The natural rungs create perfect levels for village buildings, and the vertical orientation maximizes display space in minimal floor area.
This solution is ideal for renters or those who need multi-purpose furniture. The ladder can serve its normal function most of the year, then transform into a village display during the holidays with simple styling.
Use a blanket ladder, step ladder, or even build a custom decorative ladder to your exact specifications. Add small wooden boards across the rungs if you need more surface area for larger buildings. Drape with garland or lights to enhance the festive appeal.
Corner Christmas Village Display Platform

Source: Pinterest – Gary Ingalls
Corners are often wasted space in homes, but they’re perfect for Christmas village displays. This DIY shelf design fits snugly into a corner, creating multiple tiers while occupying minimal floor space. The setup can be assembled and taken down in minutes.
The design consists of just 6 pieces of wood, 8 screws, and shelf supports—simple enough for beginner woodworkers but effective enough to create a stunning display. The corner orientation naturally draws the eye upward, creating visual interest.
This is an excellent solution for apartments, small homes, or anyone who wants an impressive village display without dedicating an entire table or room. The corner placement also keeps the village out of high-traffic areas where it might get bumped or damaged.
Wood Detail Tiered Tray Display

Source: Pinterest
Tiered trays, traditionally used for serving or displaying small items, make perfect miniature Christmas village platforms. The multiple levels are already built in, and the compact size is ideal for side tables, mantels, or kitchen counters.
This approach requires zero construction—simply purchase a tiered tray in your preferred style (rustic wood, painted metal, or elegant ceramic) and arrange your village buildings across the levels. The tray’s handles make it easy to move your entire display from room to room.
Look for tiered trays at home decor stores, craft shops, or even repurpose a cupcake stand or dessert tower. Add miniature trees, faux snow, and tiny LED lights to complete the scene. This is perfect for those who want a charming village display without dedicating significant space.
Christmas Tree-Shaped Shelf from Scrap Wood

Source: Repurpose and Upcycle
This clever design transforms scrap wood into a Christmas tree-shaped shelf that serves as both decoration and functional village display. The tree silhouette adds festive charm even before you add buildings, and the multiple shelves provide perfect platforms for your village collection.
Made from scrap wood, this project is budget-friendly and environmentally conscious. The design doesn’t take up much space and can be scaled to various sizes depending on your available materials and display needs.
The tree shape naturally creates a focal point, with buildings arranged from largest at the bottom to smallest at the top. This design works beautifully in corners or against walls, and the unique shape makes it a conversation piece even when not displaying your village.
Budget-Friendly DIY Village Display

Source: Start with the Bed
Creating a beautiful Christmas village display doesn’t require expensive materials or professional skills. This budget-friendly approach proves that with creativity and basic supplies, you can create a stunning display that captures the holiday spirit.
Use materials you likely already have: cardboard boxes for risers, wrapping paper or fabric for covering, battery-operated lights from the dollar store, and natural elements like cotton balls for snow. The total cost can be under $20 while still creating an impressive result.
The key is focusing on arrangement and lighting rather than expensive platforms. Layer buildings at different heights, add twinkling lights throughout, and use simple landscaping tricks to create depth and interest. This approach is perfect for families, renters, or anyone testing village collecting before investing heavily.
Christmas Village Beneath the Tree

Source: Porch Decor Ideas
One of the simplest yet most effective display strategies is arranging your village beneath your Christmas tree. This creates a layered, cohesive look that maximizes your holiday decorating space while requiring no additional platforms or construction.
Use natural Christmas decor elements like pine branches, faux snow, and soft lighting to blend the village seamlessly with your tree. The tree itself becomes part of the backdrop, adding height and atmosphere to your village scene.
This approach is perfect for small spaces since you’re utilizing area that’s already dedicated to holiday decorating. Add simple risers like wooden crates or stacked books to create levels, and weave battery-operated fairy lights throughout for a magical glow that complements your tree lights.
Christmas Village Display Using Old Books

Source: ILoveYouChristmas
Old books create instant, attractive risers for your Christmas village while adding a charming vintage, literary aesthetic. Stack hardcover books of varying sizes to create different levels, then place your village buildings on top for a display that feels both intellectual and festive.
This approach is perfect for book lovers and requires zero construction. Simply gather old hardcovers—thrift stores are excellent sources—and arrange them in stacks of different heights. The book spines add color and texture to your display, and you can choose books with holiday-themed covers for extra charm.
Use books you already own or find inexpensive volumes at library sales. The weight of books provides excellent stability for heavier buildings, and you can easily rearrange stacks to test different layouts. This is also a great way to display vintage or antique villages in an appropriately nostalgic setting.
Classic Tabletop Christmas Village Display

Source: Moms Journey Together
The classic tabletop display remains popular for good reason—it’s versatile, accessible, and allows for easy viewing from all angles. A dedicated table provides a stable foundation for your village, and you can customize the surface with platforms, risers, and landscaping to create depth.
Start with a sturdy table in a low-traffic area. Cover the surface with a white tablecloth or black fabric to create a neutral base, then add your platforms and buildings. Use books, boxes, or purchased risers to create multiple levels that prevent the display from looking flat.
This traditional approach works for any village size and style. You can keep it simple with just buildings and lights, or go elaborate with carved foam landscapes, realistic roads, and detailed scenery. The table format also makes it easy to protect your display from curious hands or pets by placing it against a wall or in a dedicated room.
DIY Village with Mountain and River Features

Source: Kersthuisje.nu – Tuincentrum Osdorp
This impressive display features a mountain backdrop with a flowing stream, created using specialized rock paper, moss, cork, and village accessories. The realistic landscape transforms a simple collection of buildings into an immersive winter scene that tells a story.
Creating terrain features like mountains and rivers requires more planning and materials than basic platforms, but the results are stunning. Use foam carving for the mountain structure, then cover with textured paper or plaster for realistic rock faces. Create riverbeds with blue resin, cellophane, or painted foam.
Add moss for grass areas, miniature trees for forests, and faux snow for winter peaks. The investment in time and materials pays off in a display that looks professionally created and becomes a true centerpiece of your holiday decorating. This approach works especially well for Lemax and Department 56 villages designed for landscape displays.
Build Your Own Christmas Village Stand

Source: Etsy – BlackCatPlan
For DIY enthusiasts who want professional results, building a custom village stand from plans offers the perfect balance of guidance and creativity. Detailed woodworking plans provide measurements, cut lists, and assembly instructions while allowing you to customize finishes and details.
Professional plans take the guesswork out of construction, ensuring your stand is sturdy, properly proportioned, and designed for easy assembly and storage. You can choose from various styles—tree-shaped, tiered towers, corner units, or traditional platforms—depending on your space and preferences.
Invest in quality plans from reputable sources like Etsy woodworking shops, then select lumber and finishes that match your home’s decor. The result is a one-of-a-kind display stand that fits your exact needs and can be passed down as a family heirloom. Perfect for intermediate woodworkers ready to tackle a meaningful holiday project.
Christmas Village Tiered Advent Calendar

Source: The Craft Patch
This absolutely adorable project combines a Christmas village with an advent calendar, creating a tiered display of snowy vintage houses with little doors to open each day in December. It’s both a decorative platform and an interactive holiday tradition.
The tiered design showcases multiple houses at different levels, each containing a small door or compartment. Behind each door, hide a small treat, note, or ornament to reveal during the countdown to Christmas. The vintage aesthetic with snowy roofs and warm lighting creates instant nostalgia.
This project requires more advanced crafting skills but creates an heirloom piece your family will anticipate using every year. Use wooden houses from craft stores, add details with paint and faux snow, install small hinges for doors, and number each house for the advent sequence. The result is a functional display that builds excitement throughout December.
Making Steps and Stairs for Village Display

Source: YouTube
Adding steps and stairs to your village display creates natural elevation changes and visual interest. This beginner-friendly technique uses foam board to create clean, professional-looking risers that can be painted and decorated to match your village theme.
Foam board is ideal for this application because it’s lightweight, easy to cut with a utility knife, and holds its shape well. Cut strips to your desired step height and depth, then glue them together in a stair-step pattern. Cover with paint, paper, or fabric to match your landscape.
Use these stairs to connect different platform levels, create access paths between buildings, or simply add architectural interest to your display. You can also create winding staircases, grand entrance steps for prominent buildings, or terraced garden areas. The versatility of foam board makes it perfect for experimenting with different configurations.
Multi-Level Display with Foam Carving

Source: Hot Wire Foam Factory
This professional-level display demonstrates the full potential of foam carving for creating multi-level village platforms. Using hot wire foam cutting tools, you can sculpt organic, realistic terrain that far surpasses simple geometric tiers in visual impact.
Hot wire foam cutters melt through foam cleanly, allowing you to create smooth slopes, curved hills, and natural-looking landscapes. Layer different thicknesses of foam to build up elevation, then carve away to create valleys, roads, and building sites.
Once carved, seal the foam with white glue or specialized foam primer, then paint with acrylics and add landscaping materials. The result is a museum-quality display that looks like a miniature landscape rather than a collection of buildings on shelves. This technique requires investment in tools and time but creates breathtaking results.
Cozy Holiday Corner with Tree and Village

Source: Podunksbar
This heartwarming display combines a Christmas tree with a complete village scene including trains, ferris wheels, glowing houses, and Santa climbing a ladder. The result is a magical corner that captures the wonder of the season and creates incredible family moments.
The key to this approach is creating a complete scene rather than just displaying buildings. Add interactive elements like moving trains, animated figures, and multiple light sources to bring the village to life. Position everything so viewers can see the entire scene from a comfortable viewing spot.
This style works beautifully in family rooms or spaces where people gather. The combination of tree and village creates a cohesive holiday display that maximizes impact in one dedicated area. Use platforms of varying heights to ensure all elements are visible, and weave lighting throughout for maximum warmth and magic.
Shoebox Village Dioramas with Background Scenes

Source: Casolia
This creative approach transforms old shoeboxes into individual village dioramas, each with its own background scene and miniature buildings. Stack the boxes for a layered village display that’s easy to create, store, and transport from year to year.
Each shoebox becomes a self-contained scene. Line the inside with decorative paper for walls and floor, add a painted or printed background scene, then arrange buildings, trees, and accessories inside. The box sides naturally create a frame and protect the display.
This method is perfect for small spaces, renters, or those who want multiple themed scenes without dedicating large permanent displays. You can create a winter scene, a main street, a church scene, and more—then stack or arrange them differently each year. Storage is simple: just lid the boxes and stack them in a closet.
Transforming Wooden Houses into Custom Village

Source: TikTok – Dottie’s Home
This tutorial shows how to transform simple wooden houses from craft stores like Michaels into the most charming custom Christmas village you’ve ever seen. Through painting, glittering, and accessorizing, plain wooden shapes become nostalgic, cozy holiday buildings that look like they’ve been passed down for generations.
The process is rewarding and accessible for crafters of all skill levels. Start with basic wooden house shapes, then layer paint colors, add texture with dry brushing, apply glitter for snow effects, and finish with tiny details like wreaths, lights, and miniature accessories.
The result is a one-of-a-kind holiday village full of warmth, personality, and handmade charm that no store-bought set could replicate. Display your custom houses on simple platforms—wooden crates, tiered stands, or even just a mantel with varying heights created by books or boxes. This approach lets you create exactly the village you envision.
Essential Products for Village Setup Success

Source: ILoveYouChristmas
After years of arranging holiday villages, experienced collectors have narrowed down the essential items that consistently make Christmas village setup smoother and more enjoyable. From specialized tweezers for placing tiny accessories to hidden cord solutions for clean lighting, these products help create a balanced, organized display.
Key products include: precision tweezers for placing small items, battery-operated LED lights with timers, cord concealers and cable clips, museum putty for securing buildings, faux snow and landscaping materials, miniature trees and accessories, and storage solutions for organization.
Investing in the right tools and accessories makes annual setup faster and less frustrating. You’ll spend less time problem-solving and more time enjoying the creative process of arranging your village. These products also help protect your investment by ensuring buildings are secure and cords are safely managed.
25 Cozy Ideas for Magical Holiday Setup

Source: Sit Back Lounge
This comprehensive collection brings together 25 charming ways to arrange miniature houses, snowy trees, twinkling lights, and festive accents into magical holiday centerpieces. Whether you love traditional Christmas villages or modern winter wonderlands, these DIY ideas inspire cozy setups that bring holiday magic to any room.
The ideas range from simple tabletop arrangements to elaborate multi-level landscapes, ensuring there’s inspiration for every skill level, space constraint, and budget. You’ll discover creative platform solutions, lighting techniques, landscaping tips, and styling tricks that elevate your display from ordinary to extraordinary.
Save these ideas for your holiday decorating plans and use them as a reference each year as you refine your village display. The best part about Christmas villages is that they’re endlessly customizable—you can change platforms, rearrange buildings, add new accessories, and create completely different scenes year after year using the same basic collection.
Love these ideas? Follow @theclutteredblog on Pinterest for more cozy, practical gift inspiration!