


If your makeup always explodes across your suitcase the second you start packing, you’re not alone. A simple travel cosmetic bag tutorial can save you from leaky bottles, lost lip balms, and tangled brushes every single trip. A boxy makeup bag step by step guide is one of the easiest ways to sew a sturdy, flat‑bottom bag that actually stands up and holds all your travel‑size skincare.

In this post, we’ll walk through a travel makeup bag sewing tutorial focused on a boxy / flat‑bottom cosmetic bag with a zipper. You’ll also see how to adapt this diy travel makeup organizer bag into a quick pouch or a more structured travel makeup organizer sewing pattern with a “spine” section. We’ll keep it beginner friendly with clear cutting sizes, simple zipper techniques, and a practical checklist you can reuse.

Choosing Your Travel Makeup Bag Style
Before you start cutting into fabric, decide which style of bag you want—this will guide your measurements and interfacing choices. Popular models in sewing blogs and travel tutorials include boxy / flat‑bottom cosmetic bags, organizer‑style cases, and quick zipper pouches that sew up in 20 minutes.
Three main options:
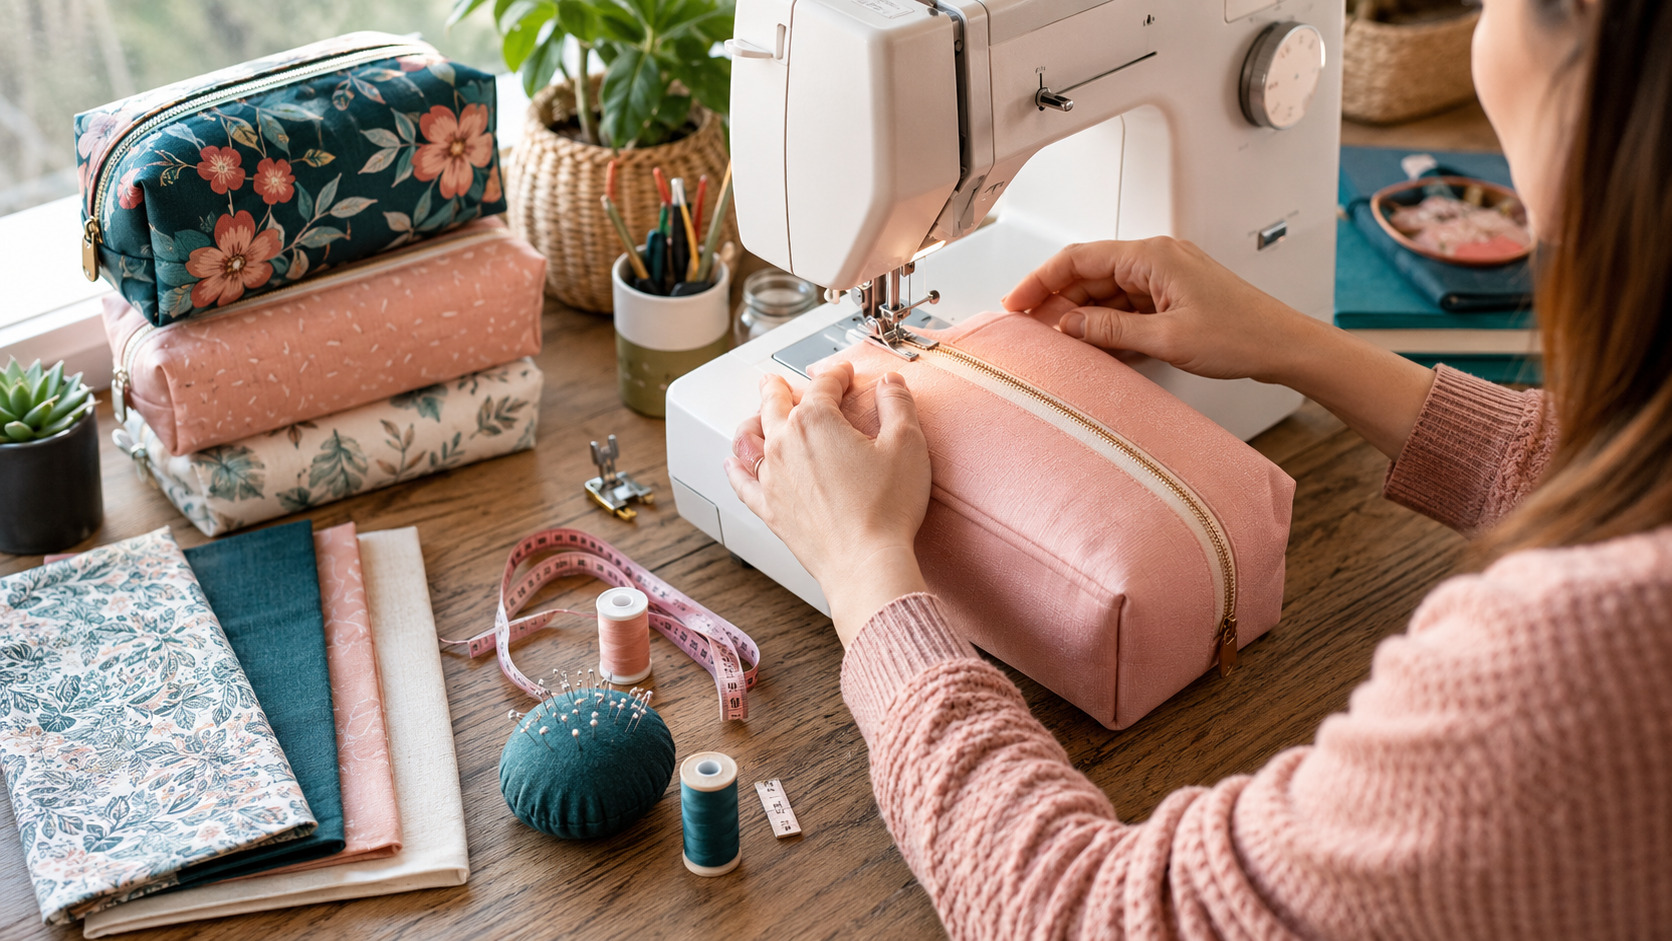
- Boxy / flat‑bottom cosmetic bag
- Travel makeup organizer bag
- Fast zipper pouch (about 20 minutes)
In this travel cosmetic bag tutorial, we’ll focus on the boxy / flat‑bottom version and note where you can tweak it toward an organizer style.
Materials And Cutting Guide
Most travel makeup bag sewing tutorial projects use small cuts of fabric, so they’re perfect for fat quarters or scraps. You’ll need an outer fabric, lining fabric, light interfacing or batting, and a zipper that’s a little longer than your bag width.
For a medium boxy makeup bag (roughly 8 in wide x 4 in tall x 3 in deep), gather:
- Outer fabric: 2 rectangles, each 11 in wide x 8 in tall (cotton, canvas, or quilted fabric).
- Lining fabric: 2 rectangles, each 11 in wide x 8 in tall.
- Interfacing: 2 rectangles of lightweight fusible interfacing or thin batting, slightly smaller than the outer pieces (about 10.75 in x 7.75 in) so they don’t sit in the seam allowance.
- Zipper: 12 in nylon zipper for a zippered cosmetic bag pattern with room to trim.
- Optional: small tab pieces (2 x 3 in) to create zipper tabs or side handles.
If you’re aiming for a more structured travel makeup organizer bag, you can cut additional rectangles for interior pockets or brush slots and use a sturdier interfacing.
Prepare Panels And Apply Interfacing
Good prep makes the final bag look crisp and professional. Tutorials on how to make a boxy cosmetic bag always start with pressing fabric and fusing interfacing to add structure.
Steps:
- Press outer and lining pieces so there are no wrinkles; this helps your seams stay accurate.
- Fuse interfacing to the wrong side of each outer panel according to the manufacturer’s instructions, usually with a medium‑heat iron and a pressing cloth.
- If you’re making a quilted outer (very popular in diy boxy makeup bag tutorials), lightly quilt the outer fabric and batting before attaching the zipper.
- For a travel makeup organizer sewing pattern style, prepare extra pocket pieces now: fold top edges over, press, and topstitch so they’re ready to attach later.
Taking time to press and stabilize now will pay off when you box corners and the bag stands up nicely on the counter.
Attach The Zipper (Beginner Friendly Zipper Pouch Sewing)
Zippers feel intimidating, but the basic technique in a step by step cosmetic bag tutorial is very repetitive and forgiving. Most diy boxy makeup bag guides use a “zipper sandwich” method where the zipper is stitched between the outer and lining layers, then topstitched for a clean finish.
Follow this sequence:
- Place one outer panel right side up. Align the zipper right side down along the top edge, with zipper pull away from the side seam allowance.
- Place one lining panel right side down on top, matching the same top edge to create a fabric‑zipper‑fabric sandwich. Clip or pin.
- Using a zipper foot, stitch along the top edge with a 1/4 in–3/8 in seam allowance, sewing through all three layers.
- Flip both fabrics away from the zipper, press the seam, and topstitch close to the zipper for a neat finish.
- Repeat with the other outer and lining pieces on the other side of the zipper so you have a long “tube” with lining on one side and outer on the other.
Some tutorials use a zipper gap method, where a small opening is left near the zipper end to make turning easier and keep zipper ends neat. Either way, keep the zipper at least halfway open before you sew side seams so you can turn the bag right side out later.

Sew Side Seams And Create Boxed Corners
This is where your flat project turns into a real boxy / flat‑bottom cosmetic bag. Guides on how to sew a boxy zipper pouch all use the same steps: sew side seams, flatten the corners, measure a triangle, stitch across, and trim.
Basic steps:
- With the zipper centered, bring outer pieces right sides together and lining pieces right sides together, matching edges.
- Pin or clip all the way around, leaving a 3–4 in turning gap in the bottom of the lining.
- Sew down the sides and across the bottom of both outer and lining layers with a 3/8 in seam allowance, avoiding the zipper teeth.
- To form boxed corners, pinch each corner so the side seam and bottom seam line up, creating a flat triangle. Measure in 1–1.5 in from the tip, draw a line across, and sew along that line.
- Trim the excess triangle off each corner, leaving a small seam allowance. Do this for all four corners (two outer, two lining).
For a travel makeup organizer bag with a spine, you might instead sew zippered side panels to a central “spine” piece, as shown in some travel cosmetics case tutorials. The principle is similar: you’re building a 3D box by joining flat panels along a spine or edge.
Once your seams and corners are sewn, pull everything through the turning gap in the lining, sew the gap closed, and push the lining into the outer shell.
Finishing Touches, Variations, And A Quick Pouch Option
You’re almost done: now it’s about pressing, adding labels, and adjusting size. Most make up bag patterns suggest pressing around the zipper and corners to sharpen the shape and adding a tag or loop for a more professional look.
Ideas to finish and customize:
- Press the bag all around, gently pushing out the boxed corners for a crisp shape.
- Add a side tab or small handle at one end of the zipper to make it easier to grab from your suitcase.
- Sew in a name label or small leather tag to turn your zippered cosmetic bag pattern into a gift.
- To create a diy flat bottom zipper pouch that’s shorter or taller, simply adjust the height of your rectangles and the boxed corner measurement.
For a “20‑minute” version inspired by quick makeup bag tutorials, you can skip interfacing, use a simpler curved pouch shape, and finish with a flap and snap instead of a zipper—ideal for a fast beginner friendly zipper pouch sewing project.
Printable Checklist: Step By Step Cosmetic Bag Tutorial
Keep this checklist beside your machine so you don’t lose track mid‑project:
- Choose the style: boxy makeup bag step by step, travel makeup organizer bag, or quick zipper pouch.
- Gather materials: outer fabric, lining, interfacing/batting, zipper, thread, clips, scissors, and zipper foot.
- Cut panels to size for your zippered cosmetic bag pattern (outer, lining, interfacing, and any pockets).
- Fuse interfacing to outer pieces; quilt if desired for a more padded diy boxy makeup bag.
- Attach the zipper using the fabric‑zipper‑fabric sandwich method and topstitch both sides.
- Sew side seams, remembering to leave a turning gap in the lining.
- Create boxed corners by flattening each corner, measuring 1–1.5 in from the point, stitching across, and trimming.
- Turn the bag right side out through the lining, close the gap, push the lining inside, and press well.
Once you’ve sewn one travel cosmetic bag tutorial from start to finish, it becomes a quick, satisfying project you can batch sew for gifts, a pink makeup travel bag set, or a full diy travel makeup organizer bag collection.
A handmade bag that fits your exact makeup routine feels like a tiny luxury in your suitcase—start with one boxy pouch, then tweak the size, pockets, and style as your confidence grows.

FAQ
FAQs About Travel Cosmetic Bag Tutorial
I barely have time to sew—what’s the quickest version of this project?
If time is tight, go for a simple zipper pouch instead of a full boxy shape. Many 20‑minute makeup bag tutorials use two rectangles and a flap or zipper, making a beginner friendly zipper pouch sewing project you can finish in one short session. You can still apply the same travel makeup bag sewing tutorial principles—outer + lining, simple closure, and neat pressing—without boxing the corners.
My energy is low and zippers scare me—can I still make a travel makeup bag?
Yes. Start with a diy flat bottom zipper pouch using a slightly longer zipper than you think you need and a soft, forgiving cotton. Tutorials on how to make a boxy cosmetic bag show that the zipper sandwich method is repetitive and easier than it looks. Focus on one step at a time: attach the zipper, sew side seams, then box corners, and remember that small wobbles don’t matter once the bag is turned and filled.
How can I keep sewing these bags consistently without my sewing room turning into chaos?
Batch your work. Cut pieces for two or three zippered cosmetic bag pattern projects at once, then interface all, then sew all zippers, then box all corners. Using one core travel cosmetic bag tutorial and just changing fabric colors or zipper pulls (for example, a matching set of pink makeup travel bag pouches) keeps your process familiar and your supplies streamlined.
I sew in a tiny space—are boxy bags still realistic?
Most diy boxy makeup bag tutorials are designed for small home setups, and you only need your machine, iron, and a bit of cutting space. Choose a compact boxy makeup bag step by step pattern and cut from fat quarters instead of yardage to keep your table clear, and press in short bursts rather than leaving the ironing board permanently set up.
I feel mentally overloaded—what’s the smallest possible “win” I can start with?
Your smallest win can be sewing a single 20‑minute pouch using an easy travel makeup bag sewing tutorial. Use the checklist, pick one fabric you love, and commit to just getting through attaching the zipper and sewing the side seams; you can box corners or add organizer pockets on another day. Every tiny pouch you finish builds skills for bigger projects like a full diy travel makeup organizer bag.
Little steps absolutely count—if all you do today is cut fabric or fuse interfacing, you’re moving forward. Save this post so you can pick up right where you left off, and follow @theclutteredblog on Pinterest for more gentle, beginner‑friendly sewing guides.


