











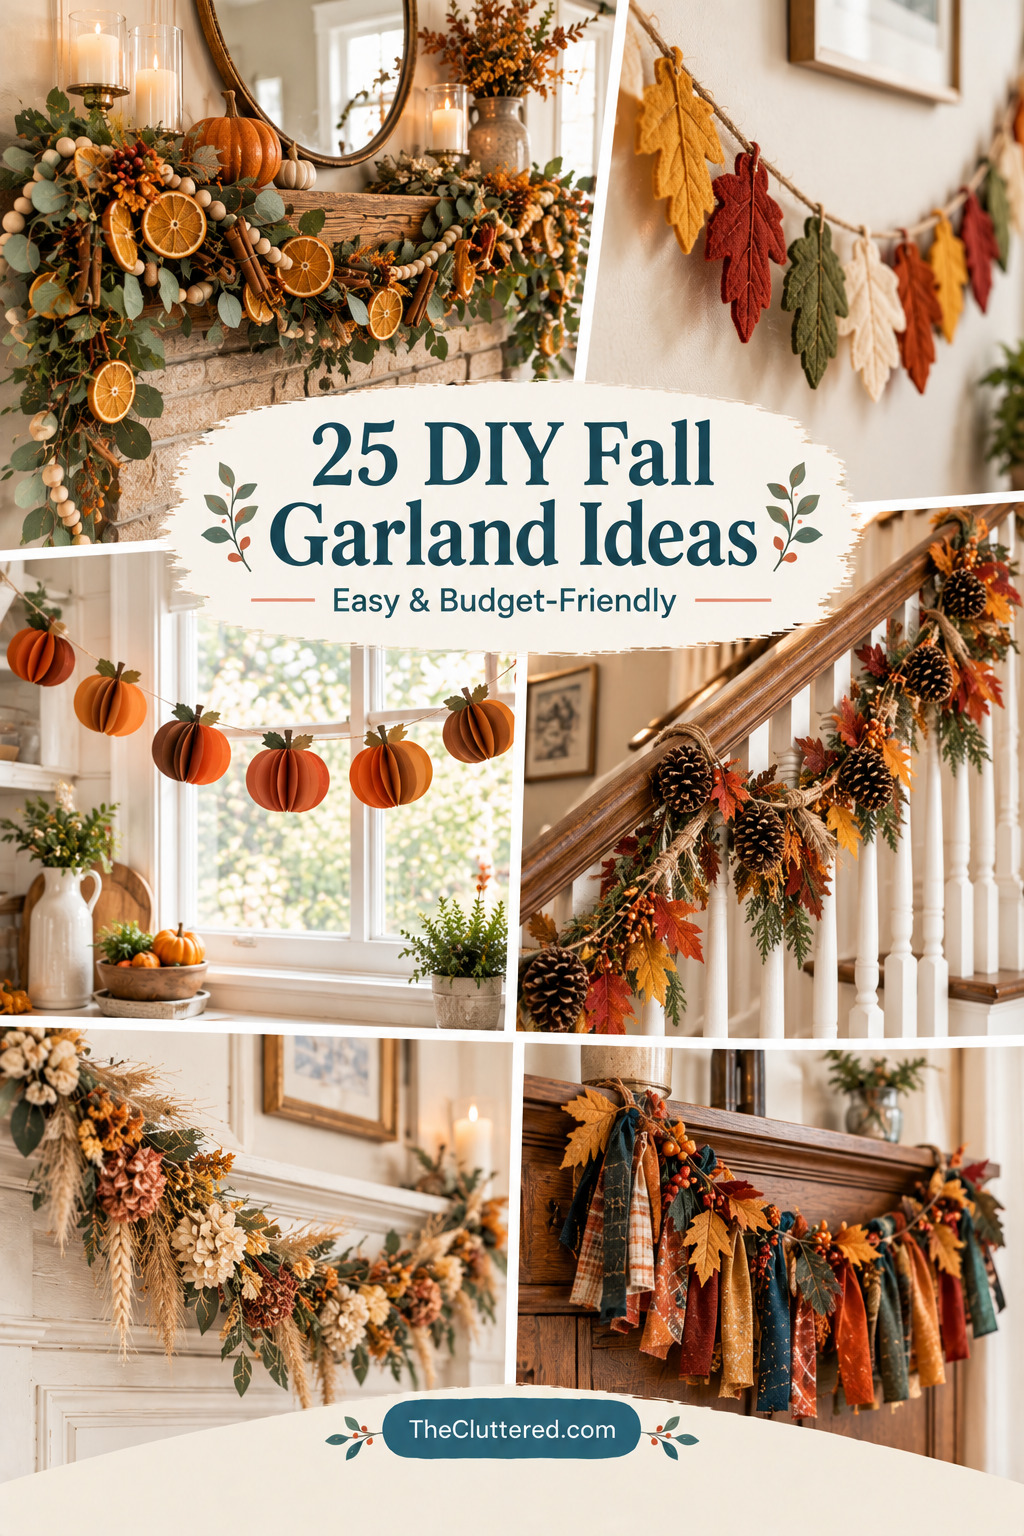


Fall is the perfect time to add warmth and personality to your home with handmade garlands. Whether you’re decorating your mantel, staircase, front door, or dining table, DIY fall garlands offer an affordable and creative way to embrace the season. From rustic natural materials to colorful paper crafts, there’s a garland style for every skill level and budget.
In this guide, you’ll discover 25 inspiring DIY fall garland ideas that range from beginner-friendly projects to more elaborate designs. You’ll find tutorials using dried oranges, felt leaves, pinecones, pumpkins, fabric scraps, and more. Each idea includes practical tips to help you create beautiful autumn decor that feels uniquely yours.
🍂 Quick Picks: Find Your Perfect Garland
- Best for beginners: Paper leaf garlands, felt garlands
- Most budget-friendly: Natural leaf garlands, paper crafts
- Most elegant: Dried orange & eucalyptus, fabric garlands
- Best for mantels: Mixed natural materials, pinecone garlands
- Best for stairs: Lightweight paper or felt garlands
- Kid-friendly: Paper chains, simple leaf garlands
Why DIY Fall Garlands Are Worth Making
Handmade garlands bring a special charm to autumn decor that store-bought options simply can’t match. When you create your own garland, you control the colors, materials, length, and style to perfectly complement your space. Plus, making garlands yourself is often more budget-friendly than purchasing pre-made versions.
DIY garlands also offer flexibility. You can make them as simple or elaborate as you like, using materials you already have or can easily find. Whether you prefer rustic farmhouse style, elegant neutrals, or bold autumn colors, there’s a garland project that fits your aesthetic.
Popular Materials for Fall Garlands
The beauty of fall garland making lies in the variety of materials you can use. Natural elements like dried leaves, pinecones, wheat stalks, and eucalyptus create organic, timeless looks. Craft materials like felt, paper, fabric scraps, and yarn offer endless color possibilities and are perfect for beginners.
Many garlands combine multiple materials for visual interest. For example, you might mix dried orange slices with cinnamon sticks and wooden beads, or combine felt leaves with mini pumpkins and acorns. The key is choosing materials that work together in color and texture.
Essential Supplies for Garland Making
Most fall garland projects require basic supplies you may already have: twine or jute string, hot glue gun or craft glue, scissors, and your chosen decorative elements. For fabric or felt garlands, you’ll need needle and thread or a sewing machine. Natural garlands may require floral wire or pipe cleaners for attaching heavier items.
Consider your garland’s location when choosing materials. Outdoor garlands need weather-resistant elements, while indoor garlands can use delicate materials like paper or dried flowers. Also think about weight—lighter garlands work better for hanging across doorways or draping on stair railings.
Where to Display Your Fall Garland
Fireplace mantels are classic garland locations, creating a stunning focal point in your living room. Staircase banisters benefit from garlands that guide the eye upward and add seasonal warmth throughout your home. Front doors welcome guests with autumn charm, while dining tables, coffee tables, and kitchen shelves offer smaller-scale decorating opportunities.
Don’t limit yourself to traditional spots. Try draping garlands across windows, along bookshelves, around mirrors, or as table runners. You can even create shorter garlands to use as gift wrap accents or place card holders for fall gatherings.
Techniques for Assembling Your Garland
The assembly method depends on your materials. For lightweight items like paper leaves or felt shapes, simply glue or sew them onto twine at regular intervals. Heavier items like pinecones or pumpkins may need wire wrapping or hot glue for secure attachment. Natural garlands often work best when you cluster items in groups of three or five for visual balance.
Layering creates depth and interest. Start with a base of greenery or leaves, then add focal points like pumpkins or dried oranges, and finish with smaller accents like berries or beads. Vary the spacing between elements to create a natural, organic flow rather than a rigid, uniform look.
Making Your Garland Last
To extend the life of your DIY fall garland, consider the materials you choose. Fresh greenery will wilt within days, while dried elements can last all season. Felt, fabric, and paper garlands can be stored and reused year after year if kept in a cool, dry place.
For outdoor garlands, use weather-resistant materials and consider applying a clear sealant to paper or fabric elements. Indoor garlands should be kept away from direct sunlight to prevent fading. When storing, gently coil your garland in a box with tissue paper to prevent crushing delicate elements.
Budget-Friendly Tips
Creating beautiful fall garlands doesn’t require a big budget. Forage for natural materials like leaves, pinecones, and branches in your yard or local park. Check dollar stores for craft supplies like felt sheets, paper, and twine. Repurpose fabric scraps from old projects or thrift store finds.
You can also stretch expensive materials by using them sparingly as accents. A few dried orange slices or mini pumpkins mixed with inexpensive leaves or paper elements create an elevated look without the premium price tag.
Quick Reference: Choosing Your Garland Style
| Style | Best Materials | Difficulty | Time Required |
|---|---|---|---|
| Rustic Farmhouse | Burlap, wood beads, dried flowers | Easy | 30-60 min |
| Natural/Organic | Leaves, pinecones, eucalyptus | Easy | 45-90 min |
| Modern Minimalist | Neutral felt, simple shapes | Easy | 30-45 min |
| Colorful & Playful | Paper, bright fabric, pom poms | Easy | 30-60 min |
| Elegant/Traditional | Dried oranges, berries, ribbon | Medium | 60-120 min |
Common Mistakes to Avoid
One frequent error is making garlands too short for their intended space. Measure your mantel, staircase, or doorway before starting, and add extra length for draping and fullness. Another mistake is using materials that are too heavy for the hanging method—always test your garland’s weight before committing to a display location.
Avoid making every element identical. Variation in size, spacing, and placement creates visual interest and a more professional look. Also, don’t skip the planning stage—lay out your materials before attaching them to ensure balanced color distribution and pleasing composition.
Checklist: Before You Start Your Garland Project
- Measure your display space and determine desired garland length
- Choose materials based on location (indoor vs. outdoor)
- Gather all supplies: twine, glue, scissors, decorative elements
- Select a color palette that complements your existing decor
- Prepare materials (dry leaves, cut paper shapes, gather pinecones)
- Plan your layout and spacing before attaching items
- Test weight and hanging method
- Have storage solution ready for off-season
- Consider adding ribbon loops for easy hanging
- Keep extra materials on hand for repairs or adjustments
- Photograph your finished garland for future reference
- Label storage container with contents and year
- Check for loose items before hanging
- Have command hooks or appropriate hanging hardware ready
- Set aside adequate workspace and time
FAQ
How long should my fall garland be?
The ideal length depends on where you’re displaying it. For mantels, measure the width and add 25-50% extra for draping. Staircase garlands typically need 10-15 feet. Front door garlands work well at 3-6 feet. Always measure your space first and add extra length for a fuller, more luxurious look.
Can I make a fall garland without sewing?
Absolutely! Many garland projects require no sewing. Use hot glue to attach paper, felt, or fabric shapes to twine. Natural materials like leaves and pinecones can be glued or wired. Paper chains require only glue or staples. No-sew options are perfect for beginners and quick projects.
How do I preserve natural leaves for garlands?
To preserve leaves, you can press them between heavy books for 1-2 weeks, or use a glycerin solution (1 part glycerin to 2 parts water) to keep them supple. Another option is to seal them with Mod Podge or clear craft sealant. For quick projects, artificial or felt leaves offer a maintenance-free alternative.
What’s the best way to hang a garland without damaging walls?
Use removable command hooks, adhesive clips, or painter’s tape for damage-free hanging. For mantels and shelves, simply drape the garland without attaching it. On stair railings, use twist ties or ribbon to secure the garland at intervals. Always test adhesive products on a small area first.
Can I mix different styles in one garland?
Yes! Mixing styles creates visual interest, but maintain cohesion through color palette or theme. For example, you might combine rustic pinecones with elegant dried oranges if they share warm autumn tones. The key is balance—use one style as the base (70%) and add accents of another style (30%).
Creating your own fall garland is one of the most rewarding autumn projects. It allows you to personalize your decor, work within your budget, and enjoy the creative process. Whether you choose simple paper leaves or an elaborate mixed-material design, your handmade garland will add warmth and charm to your home throughout the season.
Remember, there’s no wrong way to make a garland. Trust your instincts, have fun with the process, and don’t be afraid to experiment with different materials and arrangements. The best garland is one that makes you smile every time you see it.
25 DIY Fall Garland Ideas to Inspire Your Autumn Decor
Dried Orange Garland with Eucalyptus and Cinnamon

Source: The Ginger Home
This stunning garland combines dried orange slices with fresh eucalyptus, cinnamon sticks, and wooden beads for a multi-sensory autumn display. The warm citrus tones paired with green eucalyptus create beautiful contrast, while cinnamon adds both visual interest and a delightful seasonal scent.
What makes this garland special is its natural, organic feel. The varying textures—from the translucent dried oranges to the soft eucalyptus leaves and rough cinnamon bark—create depth and visual appeal. This is perfect for those who love incorporating natural elements into their decor.
To recreate this look, slice oranges thinly and dry them in a low oven (200°F) for 3-4 hours. Let everything cool completely before assembling. Thread items onto natural twine or jute, clustering elements in groups of three for visual balance. Add wooden beads between larger elements for spacing.
Colorful Felt Leaf Garland

Source: Oh Yay Studio
This cheerful felt leaf garland showcases the full spectrum of autumn colors—mustard yellow, rust orange, olive green, and cream. The soft felt material gives it a cozy, handmade quality that’s perfect for nurseries, playrooms, or any space that needs a pop of seasonal color.
Felt is an ideal material for garland making because it’s easy to cut, doesn’t fray, and holds its shape beautifully. You can use a sewing machine for a polished look or simply glue leaves to twine for a no-sew version. The variety of leaf shapes adds visual interest throughout the garland.
Download or create leaf templates in various sizes, trace onto felt in your chosen colors, and cut out. Attach leaves to twine using a zigzag stitch or fabric glue, spacing them 3-4 inches apart. Mix up the colors and leaf shapes as you go for a natural, varied look. This project is perfect for crafting with kids!
Paper Pumpkin Garland

Source: Ohoh Deco
This creative garland transforms humble toilet paper rolls into adorable pumpkins! Painted in warm orange and brown tones, these paper pumpkins create a whimsical, budget-friendly decoration that’s surprisingly charming. It’s proof that beautiful fall decor doesn’t have to be expensive.
The genius of this project is its use of recycled materials. Toilet paper rolls are free, readily available, and the perfect size for creating dimensional pumpkins. When strung together, they create a playful garland that’s perfect for kids’ rooms, classrooms, or casual fall parties.
To make your own, cut toilet paper rolls into 1-inch sections, paint them orange, and let dry. Cut small slits on opposite sides and insert a smaller brown-painted section to create the pumpkin shape. String them together with twine or yarn, adding green paper stems if desired. This is an excellent craft for involving children in fall decorating.
Preserved Leaf Garland with Glycerin

Source: Pinterest
This elegant garland features real autumn leaves preserved using the glycerin method, which keeps them supple and vibrant for months. The natural variation in leaf shapes, sizes, and colors—from golden yellow to deep burgundy—creates an authentic, organic look that artificial leaves can’t match.
Preserving leaves with glycerin is easier than you might think and extends the life of your garland significantly. The leaves remain flexible and retain much of their natural color, making this garland suitable for display throughout the entire fall season and beyond.
To preserve leaves, mix one part glycerin with two parts water in a container. Submerge fresh leaves (maple, oak, or your favorites) for 3-5 days until they feel supple. Remove, pat dry, and attach to twine using floral wire or hot glue. Space leaves 4-6 inches apart, alternating colors and varieties for visual interest.
Fabric Scrap Pumpkin Garland

Source: DIY Crafts Gal
This delightful garland showcases fabric pumpkins in various autumn colors and patterns, from solid oranges to plaid and floral prints. Using fabric scraps makes this project budget-friendly and sustainable, while the soft textile texture adds warmth and coziness to any space.
The beauty of fabric pumpkins is their versatility. You can mix and match patterns, use up leftover fabric from other projects, and create pumpkins in any size. The result is a garland that feels handmade and personal, perfect for farmhouse-style decor or anyone who loves textile crafts.
Cut fabric circles in varying sizes, gather the edges with a running stitch, stuff lightly with fiberfill, and pull tight to create pumpkin shapes. Add small fabric or twine stems. String pumpkins together on twine, spacing them 6-8 inches apart. Mix solids and patterns for visual interest.
Accordion-Style Paper Leaf Banner

Source: Astrobrights
This cheerful paper leaf garland uses a simple accordion-fold technique to create dimensional leaves that catch the light beautifully. The addition of paint splatters adds an artistic, playful touch that makes each leaf unique. With a free template available, this project is accessible to crafters of all skill levels.
The accordion fold gives these paper leaves a 3D quality that flat cutouts lack, making them more eye-catching when hung as a garland. The technique is simple enough for children to master, making this an excellent classroom or family craft project.
Download the free leaf template, cut leaves from colorful paper, and fold accordion-style. Add paint splatters or designs before folding for extra visual interest. Tie string or twine around the stem area of each leaf, spacing them 4-5 inches apart. This garland is lightweight and perfect for hanging in windows or across walls.
Pinecone and Berry Garland

Source: Little Makes
This rustic garland combines foraged pinecones with berries and touches of greenery for a woodland-inspired autumn display. The natural brown tones of the pinecones paired with pops of red or orange berries create classic fall colors that work beautifully in farmhouse and cabin-style decor.
Pinecones are free if you forage them yourself, making this an incredibly budget-friendly project. They’re also lightweight despite their substantial appearance, making them easy to hang in various locations. The addition of berries adds color and visual interest between the larger pinecone elements.
Collect pinecones of various sizes and let them dry completely. Attach to twine using floral wire or hot glue, spacing them 6-8 inches apart. Add clusters of berries (fresh, dried, or artificial) and small sprigs of greenery between pinecones. For outdoor use, spray with clear sealant to protect from weather.
Felt Acorn Garland

Source: DIY Crafts Gal
This charming felt acorn garland brings woodland charm to your fall decor. The simple acorn shape, rendered in soft felt in shades of brown and tan, creates a subtle, sophisticated garland that’s perfect for Thanksgiving tables, mantels, or nursery decor.
Acorns are an often-overlooked symbol of autumn, but they make beautiful garland elements. Felt is the perfect material because it’s easy to work with, doesn’t fray, and gives the acorns a soft, plush appearance. This garland works well in both traditional and modern fall decor schemes.
Cut felt ovals for acorn bodies and small caps in contrasting brown. Sew or glue together, adding a small loop of twine at the top. String acorns onto twine or jute, spacing them 4-5 inches apart. Vary the direction of the acorns for a natural, organic look. This project is quick enough to complete in an afternoon.
Paper Chain Pumpkin Garland

Source: Instagram
This playful garland transforms simple paper chains into pumpkin shapes, creating a festive decoration that’s perfect for fall parties, classrooms, or kids’ rooms. The classic paper chain technique gets a seasonal upgrade with orange and brown construction paper.
Paper chains are one of the easiest crafts to make, requiring only paper, scissors, and glue. By arranging the chains in pumpkin shapes and adding green paper stems, you create a garland that’s both nostalgic and on-trend. It’s an excellent project for involving children in seasonal decorating.
Cut paper into 1-inch strips in orange and brown. Form loops and link them together, gluing each connection. Create small pumpkin shapes by linking 4-5 chains together in a circle, then add a green paper stem at the top. String completed pumpkins together on twine, spacing them evenly.
Velvet Bow Garland

Source: Etsy
This luxurious velvet bow garland elevates fall decor with its rich textures and sophisticated color palette. The combination of deep autumn tones—rust, burgundy, mustard—with soft neutrals creates a timeless, elegant look that’s perfect for formal entertaining or anyone who loves refined seasonal decor.
Velvet’s plush texture catches the light beautifully, adding dimension and visual interest to your garland. The bow shape is classic and versatile, working well in both traditional and contemporary settings. This style of garland feels special enough for Thanksgiving dinner or holiday gatherings.
Cut velvet ribbon into 6-8 inch strips. Form bows by folding and securing with wire or thread in the center. Attach bows to twine or ribbon, spacing them 4-6 inches apart. Mix colors throughout for visual interest. For a fuller look, alternate large and small bows. This garland drapes beautifully on mantels and staircases.
Crochet Acorn Garland

Source: Crochet Pattern Studio
This adorable crochet acorn garland brings handmade charm to your fall decor. Each acorn is carefully crocheted in warm brown and tan yarn, creating a soft, textural garland that’s perfect for those who love fiber crafts and cozy, handmade home accents.
Crochet garlands have a special quality—the softness of the yarn and the visible stitches add warmth and personality that other materials can’t replicate. This project is beginner-friendly, making it accessible to those new to crochet while still being satisfying for experienced crafters.
Using basic crochet stitches, create acorn bodies in brown yarn and caps in tan. Stuff lightly and sew closed. Attach acorns to twine or cord, spacing them evenly. The pattern typically includes instructions for consistent sizing and secure finishing. This garland is lightweight and perfect for draping anywhere in your home.
Rag Fabric Garland

Source: Pinterest
This bohemian-inspired rag garland uses strips of fabric in autumn colors to create a relaxed, textured decoration. The informal, slightly messy look is perfect for those who love a casual, handmade aesthetic. It’s an excellent way to use up fabric scraps from other projects.
Rag garlands are incredibly easy to make—no sewing required! Simply cut fabric into strips and tie them onto a base cord. The result is a full, fluffy garland with lots of movement and texture. This style works beautifully in eclectic, boho, or farmhouse interiors.
Cut fabric scraps into 1×6 inch strips in coordinating autumn colors. Fold each strip in half over a length of twine or jute and pull the ends through the loop to create a knot. Continue adding strips, pushing them close together for a full look. Mix colors randomly or create an ombre effect.
Yarn-Wrapped Pumpkin Garland

Source: WithLoveLive
This creative garland features pumpkins made by wrapping yarn around cardboard forms, creating a soft, textural decoration in warm autumn colors. The yarn-wrapping technique is meditative and satisfying, and the finished pumpkins have a cozy, handmade quality.
Yarn crafts are perfect for fall because they add literal and visual warmth to your decor. This project uses inexpensive materials—cardboard and yarn—making it budget-friendly while still looking polished. The variety of yarn colors and textures allows for endless customization.
Cut cardboard into pumpkin shapes or use small cardboard tubes. Wrap tightly with yarn in autumn colors, securing ends with glue. Add twine stems and small felt leaves if desired. String pumpkins together on twine, spacing them 6-8 inches apart. Mix yarn textures for added visual interest.
Felt Pumpkin Pie Garland

Source: The First Year Blog
This whimsical garland features felt pumpkin pie slices complete with little whipped cream dollops! It’s a playful, food-inspired decoration that’s perfect for Thanksgiving parties, kitchen decor, or anyone who loves pie-themed autumn decor. The soft felt material gives it a cozy, handmade feel.
Pie garlands are a fun departure from traditional leaf and pumpkin motifs, adding humor and personality to your fall decor. They’re especially popular for Thanksgiving gatherings and make great conversation starters. The simple shapes are easy to cut and assemble, even for beginner crafters.
Cut felt triangles for pie slices in orange or brown, and small white circles for whipped cream. Add simple stitching details if desired. Glue or sew pieces to twine, alternating pie slices with or without whipped cream. Space them 4-5 inches apart. This garland is lightweight and perfect for hanging above buffet tables or dessert stations.
Giant Paper Leaf Garland

Source: Pinterest
This dramatic garland features oversized paper leaves that make a bold statement. The large scale creates visual impact perfect for parties, classrooms, or anyone who loves maximalist decor. Despite their impressive size, these leaves are made from simple packing or craft paper, keeping costs low.
Giant paper decorations have been trending because they’re inexpensive yet create high-impact visuals. The oversized leaves catch the eye and create a festive atmosphere. This style works particularly well for fall parties, harvest celebrations, or as photo backdrops.
Draw or trace large leaf shapes onto packing paper or kraft paper. Cut out and paint in autumn colors—mix oranges, yellows, reds, and browns for variety. Let dry completely. Punch holes at the top of each leaf and string onto fishing line or twine. Suspend from ceiling or drape across walls for maximum impact.
Crochet Fall Leaf Garland

Source: Pinterest
This beautiful crochet leaf garland showcases the artistry of handmade decor. Each leaf is carefully crocheted in a palette of rust, mustard, olive, cream, and brown—the perfect autumn color story. The soft yarn and visible stitches add warmth and texture that’s ideal for creating a cozy fall atmosphere.
Crochet garlands are treasured because they’re truly one-of-a-kind. The time and skill invested in each leaf makes this garland feel special and personal. It’s perfect for those who appreciate slow crafts and handmade home decor. This style works beautifully in cottage, farmhouse, or bohemian interiors.
Using basic crochet stitches, create leaves in various autumn colors. Most patterns include instructions for shaping and adding stem details. Attach completed leaves to twine or cord using the yarn tails or additional thread. Space leaves 3-5 inches apart, mixing colors throughout for a natural, varied look.
Simple Natural Leaf Garland

Source: Play Party Game
This straightforward garland celebrates the simple beauty of autumn leaves. Whether you use fresh leaves for a temporary display or preserve them for longer-lasting decor, this garland brings the outdoors inside with minimal effort and maximum impact.
The appeal of natural leaf garlands lies in their authenticity and ease. There’s no crafting skill required—just collect beautiful leaves and string them together. The natural variation in color, shape, and size creates an organic, effortless look that’s impossible to replicate with artificial materials.
Collect leaves in various colors and shapes. For fresh garlands, work quickly and display immediately. For preserved garlands, use the glycerin method or press leaves between books. Attach leaves to twine using floral wire, hot glue, or by simply tying the stems. Space leaves 3-5 inches apart for a balanced look.
Felt Pumpkin Garland

Source: Pinterest
This charming felt pumpkin garland embodies rustic farmhouse style with its simple shapes and natural twine stringing. The soft felt pumpkins in warm autumn oranges create a cozy, welcoming display that’s perfect for mantels, shelves, or front porch decor.
Felt pumpkins are a fall crafting staple because they’re versatile, easy to make, and look great in any style of decor. The farmhouse aesthetic comes from the simple construction, natural materials, and warm color palette. This garland feels handmade and heartfelt, perfect for creating a welcoming autumn atmosphere.
Cut felt circles in varying sizes, gather edges with running stitch, stuff lightly, and pull tight to create pumpkin shapes. Add small twine or felt stems. String pumpkins onto natural twine or jute, spacing them 6-8 inches apart. For extra charm, vary the pumpkin sizes throughout the garland.
Folded Paper Maple Leaf Garland

Source: The Craft Patch Blog
This clever garland uses a simple folding technique to create dimensional maple leaves from flat paper. The accordion-style folds give the leaves texture and movement, making them more interesting than simple cutouts. With free templates available, this project is accessible to crafters of all skill levels.
The folding technique is satisfying and meditative, and the results are surprisingly elegant. These leaves work well in any color scheme, from traditional autumn oranges and reds to more unexpected combinations. The garland is lightweight and perfect for hanging in windows where light can shine through.
Download or create maple leaf templates, cut from construction paper or cardstock. Fold accordion-style from stem to tip. Tie twine around the stem area of each leaf, spacing them 4-5 inches apart. Mix colors throughout for visual interest. Add paint splatters or glitter for extra flair if desired.
Paper Flower Fall Garland

Source: Pinterest
This vibrant garland features paper flowers in warm fall colors—sunflowers, dahlias, and other autumn blooms create a cheerful, festive display. Paper flowers allow you to have beautiful blooms year after year without wilting, making them a practical choice for seasonal decor.
Paper flower garlands are perfect for fall parties, Thanksgiving tables, or anyone who loves floral decor but wants something more permanent than fresh flowers. The variety of flower types and colors keeps the garland interesting and eye-catching. This style works well in both traditional and modern settings.
Create or purchase paper flowers in fall colors—yellows, oranges, rusts, and deep reds. Attach flowers to twine or ribbon using hot glue or by threading through the centers. Space flowers 6-8 inches apart, mixing types and colors. Add paper leaves between flowers for a fuller look.
Burlap Leaf Garland

Source: Pinterest
This rustic garland features leaves cut from natural burlap fabric, creating a textural, earthy decoration that’s perfect for farmhouse-style fall decor. The neutral tan color of burlap works with any autumn color scheme and adds organic texture to your seasonal displays.
Burlap is an affordable, readily available material that’s easy to work with. Its rough, natural texture adds visual interest and pairs beautifully with other rustic elements like wood, twine, and dried botanicals. This garland has a relaxed, casual feel that’s perfect for everyday fall decorating.
Cut burlap into leaf shapes using a template or freehand. The fabric’s loose weave means edges will fray slightly, adding to the rustic charm. Attach leaves to twine or jute using hot glue or by sewing. Space leaves 4-6 inches apart. For extra dimension, layer two leaves together before attaching.
Wood Bead and Leaf Garland

Source: Home Decor Gen
This contemporary garland combines natural wood beads with simple felt leaves in a sophisticated palette of mustard, rust, olive, and cream. The clean lines and neutral colors make it perfect for modern homes or anyone who prefers subtle, elegant seasonal decor over bold, traditional fall colors.
Wood bead garlands have been trending in home decor because they add texture and warmth without overwhelming a space. The addition of felt leaves keeps it seasonal while maintaining a refined aesthetic. This style works beautifully in Scandinavian, modern farmhouse, or minimalist interiors.
String natural wood beads onto twine or jute, spacing them 2-3 inches apart. Add felt leaves between bead clusters, securing with knots or glue. Keep the color palette restrained—2-3 colors maximum—for a cohesive, modern look. This garland is lightweight and perfect for draping on mantels or shelves.
Dried Flower and Wheat Garland

Source: Pinterest
This sophisticated garland features dried flowers, wheat stalks, and other botanicals in neutral autumn tones. The natural materials and muted color palette create a timeless, elegant look that’s perfect for formal entertaining or anyone who appreciates refined seasonal decor.
Dried botanicals are wonderful for fall garlands because they’re lightweight, long-lasting, and have a beautiful organic quality. The combination of different textures—wheat’s linear form, flowers’ softness, and seed pods’ structure—creates visual interest without overwhelming color.
Gather dried flowers, wheat stalks, eucalyptus, and other botanicals. Trim stems to 4-6 inches. Attach to twine or floral wire, clustering 2-3 elements together at each attachment point. Space clusters 6-8 inches apart. For a cohesive look, stick to a neutral palette of creams, tans, and soft browns.
Candy Corn Paper Chain Garland

Source: DIY Crafts Gal
This festive garland mimics the iconic candy corn using paper chains in yellow, orange, and white. It’s a playful, budget-friendly decoration perfect for Halloween parties, classroom decor, or adding a touch of whimsy to your fall displays. The simple paper chain technique makes this accessible to all skill levels.
Candy corn is a beloved (or polarizing!) symbol of Halloween, and this garland captures its cheerful spirit without the sugar. The three-color pattern creates visual rhythm, and the garland is lightweight enough to hang anywhere. It’s an excellent project for involving children in Halloween decorating.
Cut paper into 1×6 inch strips in yellow, orange, and white. Create chains by linking three strips in candy corn order (yellow base, orange middle, white tip), gluing each connection. String completed candy corn shapes together on twine, spacing them 3-4 inches apart for a festive, colorful display.
Mixed Material Statement Garland

Source: Prudent Penny Pincher
This show-stopping garland combines multiple materials—natural elements, fabric, paper, and craft supplies—to create a full, dimensional statement piece. By mixing textures, colors, and materials, you create a garland that’s uniquely yours and packed with visual interest.
The beauty of mixed material garlands is their versatility. You can incorporate items you already have, use up craft supplies, and create something that perfectly matches your personal style. This approach allows for maximum creativity and ensures your garland is one-of-a-kind.
Start with a base of greenery or leaves, add focal points like pumpkins or dried oranges, fill in with smaller elements like berries or beads, and finish with ribbons or fabric strips. Layer materials for depth, vary spacing for visual rhythm, and trust your instincts. The best garland is one that makes you happy!
Love these ideas? Follow @theclutteredblog on Pinterest for more cozy, practical gift inspiration!