












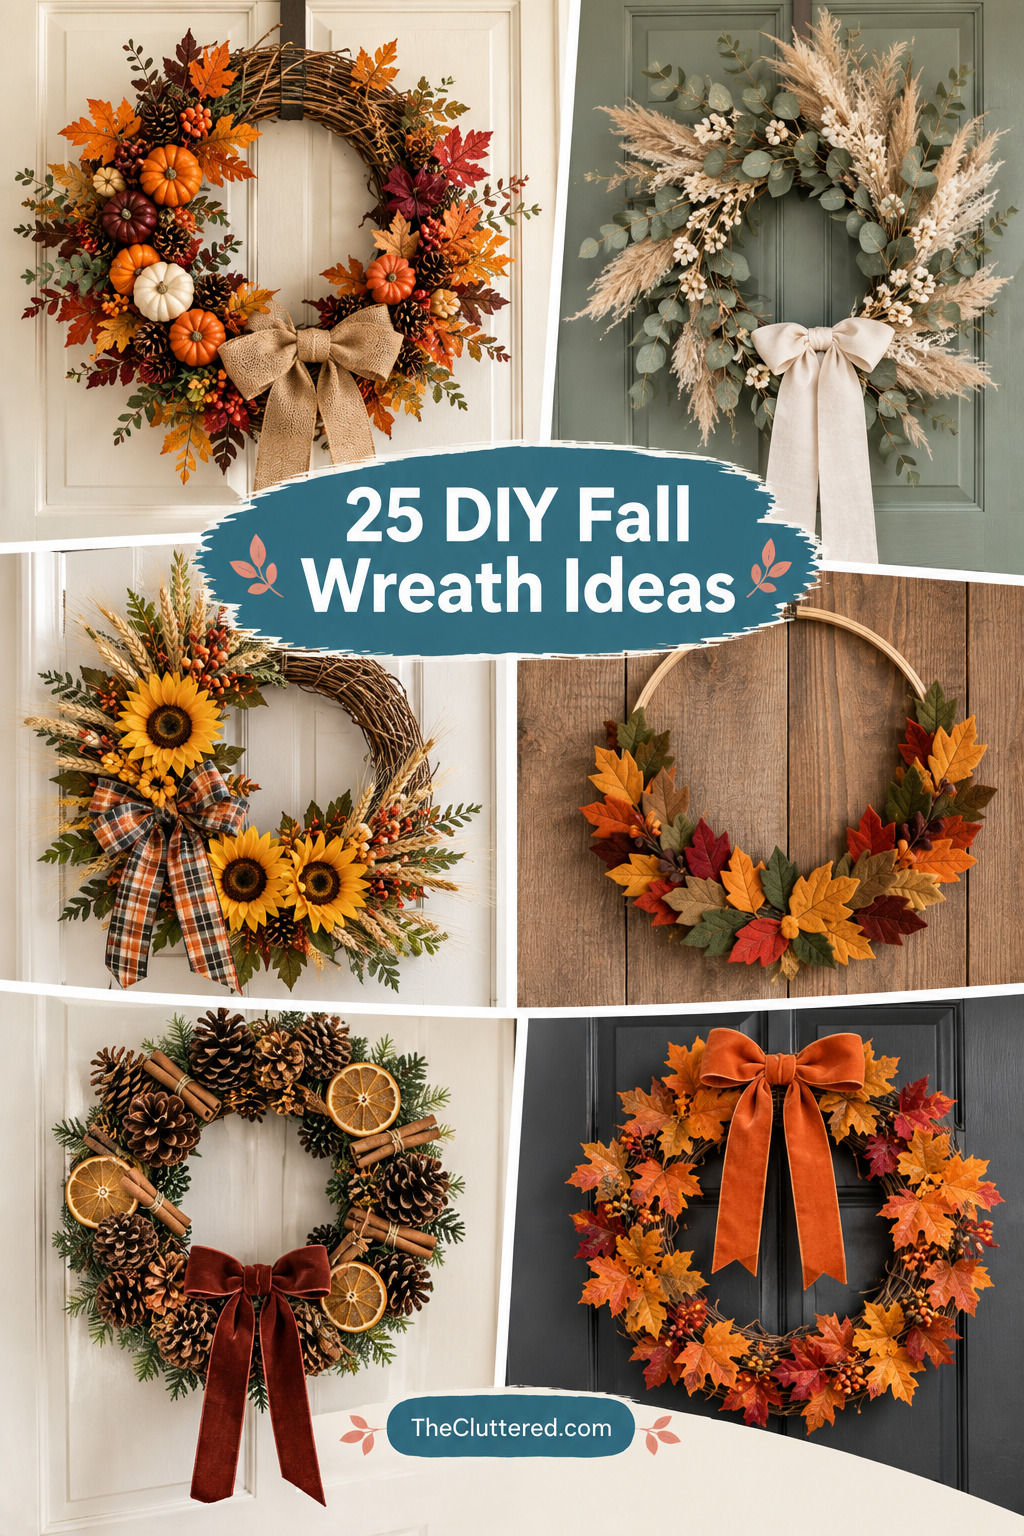


There’s something magical about crafting your own fall wreath. Whether you’re welcoming autumn with rustic charm or modern elegance, a handmade wreath instantly transforms your front door into a seasonal statement. The best part? You don’t need to be a crafting expert or break the bank to create something beautiful.
This guide brings together 25 inspiring DIY fall wreath ideas that range from super simple projects perfect for beginners to more elaborate designs that’ll make your neighbors stop and stare. You’ll find options using grapevine bases, burlap ribbons, natural materials like pinecones and wheat, budget-friendly Dollar Tree finds, and everything in between.
From cozy farmhouse styles to sleek modern designs, these wreaths celebrate the warm colors and textures of autumn. Let’s dive into the ideas that’ll help you create the perfect fall welcome for your home.
Quick Start: Find Your Perfect Fall Wreath
Not sure where to begin? Here’s a quick guide to help you choose the right wreath project based on your needs:
Best for Beginners
- Grapevine wreath with faux leaves – Just hot glue and go
- Fabric scrap wreath – No sewing required
- Paper leaf wreath – Simple cutting and gluing
- Pinecone wreath – Easy arrangement on foam base
Best for Budget-Conscious Crafters
- Dollar Tree supply wreaths – Under $15 total
- Natural material wreaths – Free foraged items
- Fabric scrap wreaths – Use what you have
- Paper wreaths – Minimal cost
Best for Front Door Impact
- Large grapevine wreaths – 24-30 inches
- Pumpkin and leaf combinations – Bold autumn colors
- Multi-texture designs – Layers of interest
- Lighted wreaths – Evening appeal
Best for Small Spaces
- Mini wreaths – 12-16 inches
- Indoor door wreaths – Compact designs
- Wall-mounted options – No door needed
Essential Materials for DIY Fall Wreaths
Before you start crafting, here’s what you’ll typically need for most fall wreath projects:
Wreath Bases
- Grapevine wreaths – Natural, rustic look, easy to work with
- Straw or hay wreaths – Traditional farmhouse style
- Foam wreath forms – Great for inserting stems
- Wire wreath frames – Sturdy, versatile
- Wooden hoops – Modern, minimalist aesthetic
- Cardboard circles – Budget-friendly DIY base
Popular Fall Decorations
- Artificial leaves – Maple, oak, eucalyptus in autumn colors
- Mini pumpkins and gourds – Foam, fabric, or real (dried)
- Pinecones – Natural or painted
- Wheat stalks – Harvest appeal
- Burlap ribbon – Rustic texture
- Berries – Red, orange, or white
- Acorns – Natural woodland touch
- Cinnamon sticks – Scent and visual interest
- Dried orange slices – Beautiful natural element
- Sunflowers – Cheerful autumn accent
Tools & Supplies
- Hot glue gun and glue sticks
- Floral wire or paddle wire
- Wire cutters
- Scissors
- Ribbon for hanging
- Optional: floral tape, craft paint, twine
Step-by-Step: How to Make a Basic Fall Wreath
If you’re new to wreath making, here’s a simple process that works for most designs:
- Prepare your base: If using grapevine, fluff and shape it. For foam forms, you may want to wrap with moss or burlap first.
- Gather your materials: Lay out all your decorations and arrange them on the wreath before gluing to plan your design.
- Create focal points: Decide where your main elements (like pumpkins or large flowers) will go. Usually 2-3 focal points work well.
- Add greenery first: Attach leaves, eucalyptus, or other foliage as your base layer.
- Layer in accents: Add pinecones, berries, and smaller elements around your focal points.
- Attach your bow: Make or attach your ribbon bow, usually at the top or bottom of the wreath.
- Fill in gaps: Add smaller elements to cover any visible mechanics or bare spots.
- Add a hanger: Attach ribbon or wire to the back for hanging.
Pro Tips for Success
- Work in sections: Divide your wreath into quadrants and work on one at a time for even distribution.
- Use the rule of three: Odd numbers (especially 3) are more visually appealing than even numbers.
- Vary textures: Mix smooth, rough, soft, and hard elements for visual interest.
- Consider weight: Heavier items need secure attachment with wire, not just glue.
- Step back often: View your wreath from a distance to check balance and proportion.
Choosing the Right Style for Your Home
| Style | Best For | Key Elements | Difficulty |
|---|---|---|---|
| Rustic Farmhouse | Traditional homes, country decor | Burlap, wheat, dried flowers, natural materials | Easy |
| Modern Minimalist | Contemporary spaces, clean aesthetics | Neutral colors, simple shapes, limited elements | Easy |
| Traditional Autumn | Classic fall decor lovers | Orange/red leaves, pumpkins, berries | Easy-Medium |
| Elegant/Neutral | Sophisticated entryways | Creams, whites, dried botanicals, subtle textures | Medium |
| Budget-Friendly | First-time crafters, Dollar Tree shoppers | Faux stems, craft supplies, repurposed materials | Easy |
Budget Breakdown: What to Expect
One of the best things about DIY fall wreaths is that you can create something beautiful at almost any price point:
Under $15 (Budget-Friendly)
- Grapevine wreath: $5-8
- Dollar Tree faux stems: $3-5
- Ribbon: $2-3
- Hot glue (if you don’t have): $3-5
$15-30 (Mid-Range)
- Quality wreath base: $8-12
- Premium faux florals: $10-15
- Decorative accents: $5-8
- Ribbon and supplies: $3-5
$30-50+ (High-End Look)
- Large or specialty base: $15-25
- Designer-quality stems: $20-30
- Multiple accent types: $10-15
- Premium ribbon: $5-10
Money-saving tip: Shop clearance sales after Halloween for next year’s supplies, or use natural materials you can forage for free like pinecones, branches, and dried grasses.
Fall Wreath Checklist: Your Quick Reference
- □ Choose your wreath base (grapevine, foam, wire, wooden hoop)
- □ Select a color palette (traditional autumn, neutral, bold, or mixed)
- □ Gather 3-5 types of decorative elements for variety
- □ Pick 2-3 focal point items (pumpkins, large flowers, etc.)
- □ Choose ribbon that complements your color scheme
- □ Have hot glue gun ready with extra glue sticks
- □ Cut floral wire into 6-inch pieces for securing heavy items
- □ Plan your layout before gluing anything down
- □ Start with greenery/foliage as your base layer
- □ Add focal points in odd numbers (usually 2-3)
- □ Fill in with medium-sized accents
- □ Add small details like berries or acorns last
- □ Create or attach your bow
- □ Check for gaps and fill as needed
- □ Attach hanging ribbon or wire to the back
- □ Step back and view from different angles
- □ Make sure it’s balanced and secure
- □ Display and enjoy your handmade autumn decor!
FAQ: Your Fall Wreath Questions Answered
How long does a DIY fall wreath take to make?
Most beginner-friendly fall wreaths take 30-60 minutes from start to finish. More elaborate designs with multiple layers and elements might take 1-2 hours. The key is gathering all your materials first and planning your layout before you start gluing.
Can I make a fall wreath without a wreath form?
Absolutely! You can create a wreath using just grapevine branches woven together, make a cardboard circle base, use a wire coat hanger bent into a circle, or even create a free-form design with just hot glue and decorations. No traditional form is required.
What’s the best way to attach items to a grapevine wreath?
For lightweight items like leaves and small berries, hot glue works perfectly. For heavier items like pumpkins or pinecones, use floral wire to secure them to the grapevine branches, then add a dab of hot glue for extra stability. You can also tuck stem picks directly into the grapevine.
How do I make my wreath weather-resistant for outdoor use?
Use outdoor-rated materials like UV-resistant faux florals, seal natural elements with clear outdoor spray sealer, choose a weather-resistant base like grapevine or treated wood, and attach everything securely with both wire and glue. Avoid paper elements or untreated natural materials that will deteriorate.
Where’s the best place to hang a fall wreath?
Your front door is the classic choice, but don’t limit yourself! Fall wreaths look beautiful on interior doors, above the fireplace mantel, in the dining room, on kitchen cabinets, or even as a table centerpiece laid flat with candles in the middle. Get creative with placement!
Making It Yours: Personalization Ideas
The beauty of DIY wreaths is that you can customize them to perfectly match your style and space:
Add Your House Number
Incorporate wooden or metal house numbers into your wreath design for a functional and decorative touch. This works especially well with rustic or farmhouse-style wreaths.
Include a Monogram
Add a wooden initial or family name sign to the center or bottom of your wreath for a personalized welcome.
Match Your Door Color
Choose ribbon and accent colors that complement or contrast beautifully with your front door color for maximum impact.
Reflect Your Interior
If your wreath will be visible through a glass door, consider coordinating it with your interior fall decor for a cohesive look from both inside and out.
Seasonal Transitions
Create a base wreath that you can easily swap out elements for different seasons—keep the base and just change the decorative accents!
Caring for Your Handmade Wreath
With proper care, your DIY fall wreath can last for years:
Storage Tips
- Store in a cool, dry place away from direct sunlight
- Use a wreath storage bag or box to prevent dust and crushing
- Hang it or lay it flat—don’t stack heavy items on top
- Keep away from moisture to prevent mold or rust
Maintenance
- Dust regularly with a soft brush or hair dryer on cool setting
- Check for loose elements and re-glue as needed
- Refresh ribbon bows if they become crushed
- For outdoor wreaths, bring inside during severe weather
Extending Life
- Rotate seasonal wreaths to prevent sun fading
- Apply UV protectant spray to faux florals
- Touch up painted elements as needed
- Replace any items that show wear
Ready to Get Crafting?
Now that you have the knowledge and inspiration, it’s time to create your perfect fall wreath! Remember, there’s no wrong way to make a wreath—it’s all about creating something that brings you joy and welcomes the season beautifully.
Start simple if you’re new to crafting, or dive into a more elaborate design if you’re feeling confident. The most important thing is to have fun with the process and create something that makes your heart happy every time you walk through your door.
Whether you choose rustic charm, modern elegance, or traditional autumn warmth, your handmade wreath will be a labor of love that sets the tone for the entire season. Happy crafting!
Cheap and Easy DIY Fall Wreath Collection

Source: Prudent Penny Pincher via Pinterest
This comprehensive collection showcases dozens of budget-friendly fall wreath ideas that prove you don’t need to spend a fortune to create something beautiful. The designs feature accessible materials like Dollar Tree finds, basic craft supplies, and simple techniques that anyone can master.
What makes these wreaths so appealing is their variety—from rustic grapevine designs to colorful leaf arrangements, there’s something for every style and skill level. The budget-conscious approach means you can create multiple wreaths for different areas of your home without breaking the bank.
To recreate this approach, start by shopping your local dollar store for faux stems, ribbon, and a basic wreath form. Mix and match different elements to create unique combinations, and don’t be afraid to experiment with color palettes that complement your existing decor.
DIY Lighted Ghost Wreath

Source: First Home Love Life via Pinterest
This elegant ghost wreath brings a sophisticated touch to Halloween decorating. The white ghost silhouettes create a subtle spooky vibe that’s more charming than scary, making it perfect for families who want festive decor without being too intense.
The lighted feature adds extra magic, especially for evening trick-or-treaters. This Pottery Barn-inspired design proves you can achieve high-end looks with DIY creativity and the right materials. The clean white palette works beautifully with traditional autumn colors or stands alone as a statement piece.
To make your own, you’ll need a grapevine or wire wreath form, white ghost cutouts (foam or fabric), battery-operated fairy lights, and strong adhesive. Arrange the ghosts in a balanced pattern, weave the lights throughout, and secure everything well for outdoor durability.
Cozy Fall Wreath Tutorial

Source: Vicky’s Interior Design via Pinterest
This cozy fall wreath embodies everything we love about autumn decorating—warm colors, natural textures, and an inviting presence that makes your front porch feel like home. The video tutorial format makes it easy to follow along, even if you’re new to wreath making.
The design focuses on creating layers of visual interest with different leaf types, subtle accents, and a balanced composition that draws the eye. The warm autumn palette of oranges, reds, and yellows creates that quintessential fall feeling.
Follow the step-by-step video to learn proper layering techniques, how to secure elements for durability, and tips for achieving that professional, full look. The techniques shown here can be adapted to create wreaths in any color scheme or style you prefer.
Thanksgiving Crafts for Kids

Source: Her Sweet Haven via Pinterest
This collection recognizes that fall crafting isn’t just for adults—kids love creating seasonal decorations too! These Thanksgiving-themed projects are designed to be age-appropriate, using safe materials and simple techniques that children can successfully complete.
The wreath ideas featured here use materials like construction paper, felt, yarn, and other kid-friendly supplies. They’re perfect for keeping little ones occupied while you’re busy in the kitchen preparing holiday meals, and the finished products make wonderful decorations or gifts for grandparents.
When crafting with kids, prep materials in advance, choose non-toxic adhesives, and focus on the process rather than perfection. These wreaths celebrate creativity and give children a sense of accomplishment while contributing to your family’s holiday decor.
Felt Leaf Wreath DIY

Source: MENTŐÖTLET via Pinterest
This felt leaf wreath brings a modern, handmade aesthetic to fall decorating. The soft texture of felt creates a different visual appeal compared to traditional faux foliage, and the vibrant autumn colors pop beautifully against the neutral base.
Felt is an excellent material for wreath making because it’s easy to cut, doesn’t fray, and holds its shape well. You can create leaves in various sizes and shades to add depth and dimension to your design. This approach works especially well for those who prefer contemporary or Scandinavian-inspired decor.
To make your own, cut leaf shapes from felt in various autumn colors, arrange them on a wreath form in an overlapping pattern, and secure with hot glue or fabric glue. Mix in some felt acorns or berries for added interest, and consider adding a simple felt bow to complete the look.
Felt Acorn and Oak Leaf Wreath

Source: DIY & Crafts Gal via Pinterest
This delightful wreath captures the essence of autumn with its combination of felt acorns and oak leaves. The natural woodland theme is both charming and sophisticated, making it suitable for various decor styles from rustic to modern farmhouse.
The use of felt allows for precise, clean shapes that maintain their appearance throughout the season. Unlike real leaves that can wilt or fade, these handmade elements will look fresh from the first day of fall through Thanksgiving and beyond.
Create your own by cutting oak leaf templates from felt in warm autumn shades, crafting tiny acorns with brown felt caps and tan bodies, and arranging them artfully on a wooden hoop or grapevine base. The key is varying the placement and layering for a natural, organic look.
100 Fall Wreath Ideas for Autumn Front Door

Source: Everyday Wholesome via Pinterest
This extensive collection offers an incredible variety of fall wreath inspiration, ensuring there’s something for every taste, skill level, and budget. With 100 different ideas, you can create multiple wreaths throughout the season or find the perfect design for your specific space.
The farmhouse focus means you’ll find plenty of rustic elements like burlap, wheat, dried flowers, and natural materials. These designs emphasize comfort, tradition, and that welcoming country aesthetic that’s so popular in fall decorating.
Browse through the collection to identify recurring themes and techniques that appeal to you. Notice how successful wreaths balance different textures, incorporate odd numbers of focal points, and use color strategically. Use these principles to guide your own custom creation.
Cozy Fall Pipe Cleaner Crafts

Source: Colorfulfor via Pinterest
Pipe cleaners might not be the first material that comes to mind for fall wreaths, but they’re incredibly versatile and fun to work with! These fuzzy wires can be twisted into leaves, pumpkins, acorns, and all sorts of autumn-themed shapes.
The beauty of pipe cleaner crafts is their accessibility—they’re inexpensive, readily available, and require no special tools. They’re also perfect for crafting with kids or for those who want a quick, no-mess project. The results are charmingly handmade and full of personality.
Create a wreath by twisting pipe cleaners into leaf shapes in fall colors, then attaching them to a wire or grapevine base. Mix in some pipe cleaner pumpkins or berries for variety. The fuzzy texture adds a cozy, tactile element that’s uniquely appealing.
Leafy Felt Wreath for All Seasons

Source: Inspirations Times via Pinterest
This versatile felt wreath concept celebrates the beauty of changing seasons through handmade artistry. The leafy design can be adapted for fall with warm oranges, reds, and golds, or modified for other seasons by simply changing the color palette.
Felt’s soft texture and clean edges make it ideal for creating crisp, defined leaf shapes that maintain their appearance throughout the season. The material is forgiving to work with, doesn’t require sewing, and creates a polished, professional look even for beginner crafters.
To create your own, cut various leaf shapes from felt in complementary colors, layer them for dimension, and attach to a wreath form using hot glue. Consider adding felt berries, acorns, or other seasonal elements to enhance the design and make it uniquely yours.
35 Easy Fall Crafts for Kids

Source: Nikki’s Plate via Pinterest
This collection recognizes that fall crafting is a wonderful way to engage children with the season while developing their creativity and fine motor skills. The projects are designed to be age-appropriate, using simple supplies and clear instructions.
Wreath-making activities for kids might include paper plate wreaths with handprint leaves, yarn-wrapped designs, or simple arrangements of artificial leaves on foam forms. These projects give children a sense of accomplishment and create lasting memories.
When planning fall crafts with kids, have all materials prepped and ready, choose non-toxic adhesives and paints, and embrace the creative process over perfect results. These handmade wreaths become treasured decorations that celebrate your child’s unique perspective on autumn.
Creative DIY Pinecone Wreath Ideas

Source: Casolia via Pinterest
Pinecone wreaths bring natural woodland charm to fall and winter decor. These creative designs showcase pinecones in various ways—from all-pinecone wreaths to mixed arrangements with other natural elements like berries, leaves, and twigs.
Pinecones are freely available in many areas, making them an eco-friendly and budget-friendly crafting material. They can be left natural for a rustic look, painted for a pop of color, or dusted with faux snow for winter transitions.
To create a pinecone wreath, collect or purchase pinecones in various sizes, attach them securely to a wreath form using hot glue and wire for support, and fill in gaps with complementary elements like eucalyptus, berries, or ribbon. The result is a textured, dimensional piece that celebrates nature’s beauty.
40 Easy Halloween Crafts for Kids

Source: Nikki’s Plate via Pinterest
This collection bridges the gap between early fall and Halloween, offering craft ideas that are festive without being too spooky. The projects include wreath-making activities featuring pumpkins, friendly ghosts, bats, and other Halloween symbols that kids love.
These crafts are designed with practicality in mind—low-mess options for younger children, simple supplies that are easy to find, and projects that can be completed in a reasonable timeframe to match children’s attention spans.
Halloween wreath projects for kids might include paper plate designs with cut-out ghosts, handprint pumpkins arranged in a circle, or simple arrangements of orange and black materials. These activities help children engage with the season creatively while building confidence in their crafting abilities.
35 Easy DIY Fall Decor Ideas

Source: Nikki’s Plate via Pinterest
This comprehensive collection positions wreaths as part of a larger fall decorating strategy. The ideas range from handmade pumpkins and autumn wreaths to garlands, centerpieces, and thrift store makeovers that transform your entire home for the season.
What makes these ideas special is their emphasis on handmade charm and affordability. The projects prove that you don’t need expensive store-bought decor to create a warm, inviting autumn atmosphere—just creativity and willingness to get your hands dirty.
When approaching fall decor holistically, consider how your wreath coordinates with other elements in your space. Use consistent color palettes, repeat materials like burlap or natural wood, and create visual connections between your front door wreath and indoor decorations for a cohesive look.
20 Pumpkin Wreath DIY Ideas

Source: Willtiptop via Pinterest
Pumpkin wreaths are arguably the most iconic fall decoration, and this collection showcases their incredible versatility. From subtle, elegant designs to bold, festive statements, pumpkin wreaths can be adapted to suit any taste or occasion throughout the autumn season.
The variety includes wreaths made from actual mini pumpkins (real or faux), pumpkin-shaped wreaths, orange-themed designs, and arrangements that incorporate pumpkins with other fall elements. Some lean toward Halloween with added spooky touches, while others celebrate harvest and Thanksgiving.
To create your own pumpkin wreath, choose your pumpkin type (mini gourds, foam pumpkins, fabric pumpkins, or painted elements), arrange them on a sturdy base with plenty of adhesive and wire support, and complement with leaves, berries, or ribbon. Consider the weight distribution to ensure your wreath hangs properly.
How to Make a Fall Wreath Tutorial

Source: Happy Hapy Nester via Pinterest
This detailed tutorial breaks down the wreath-making process into manageable steps, making it accessible even for complete beginners. The clear instructions and visual guidance help you understand not just what to do, but why each step matters.
The tutorial likely covers essential techniques like preparing your base, arranging elements for visual balance, securing decorations properly, and finishing touches that elevate your wreath from good to great. These fundamental skills can be applied to countless wreath designs beyond just fall themes.
Follow along carefully, taking notes on techniques that work well for you. Pay attention to tips about adhesive choices, weight distribution, and creating depth through layering. Once you master these basics, you’ll have the confidence to experiment with your own unique designs.
Sunflower and Wheat Harvest Wreath

Source: Porch Decor Ideas via Pinterest
This stunning combination of golden wheat stalks and bright sunflowers creates the perfect harvest-inspired display. The natural elements work together beautifully, transitioning seamlessly from late summer into autumn with just one versatile design.
The cheerful yellow of sunflowers paired with the warm gold of wheat evokes feelings of abundance and gratitude—perfect themes for the fall season. This wreath embodies that classic farmhouse aesthetic that’s both welcoming and timeless.
Best of all, these natural materials are budget-friendly and widely available. You can often find dried wheat and artificial sunflowers at craft stores or even create your own with foraged materials. The result is an authentic, rustic piece that brings genuine harvest charm to your front door.
21 DIY Wooden Pumpkin Ideas

Source: Bubblerelief via Pinterest
Wooden pumpkins solve a very specific autumn problem: real pumpkins eventually rot and collapse, while wooden ones last for years. This practical approach to fall decor means you can build one beautiful wooden pumpkin and bring it out every September without worry.
These projects range from simple painted wood slices to more elaborate carved or assembled designs. Wooden pumpkins can be incorporated into wreaths as focal points, used as standalone decorations, or combined into garlands and other arrangements.
The charm of wooden pumpkins lies in their versatility—they work for both fall and Halloween, can be painted in any color scheme, and develop a lovely patina over time. They’re also sturdy enough for outdoor use and won’t attract pests like real pumpkins might.
Eucalyptus Wreath You Can Restyle

Source: WM Design House via Pinterest
This brilliant concept maximizes your crafting investment by creating a versatile eucalyptus base that can be adapted for every season. Start with a foundation of eucalyptus stems, then simply swap out seasonal accents throughout the year.
For fall, add mini pumpkins, autumn leaves, and warm-toned berries. In winter, incorporate pinecones and red berries. Spring calls for pastel flowers, and summer loves bright blooms. The eucalyptus provides a consistent, elegant backdrop that works year-round.
This approach is perfect for those who love seasonal decorating but don’t want to create entirely new wreaths four times a year. It’s also more sustainable and cost-effective, making it a smart choice for environmentally conscious crafters.
Pumpkin Wreath DIY Collection

Source: Crafty Diyers via Pinterest
This collection showcases the playful side of fall decorating with creative pumpkin wreath ideas that go beyond traditional designs. The inclusion of pom pom elements adds texture, color, and a whimsical touch that’s perfect for those who want something different.
Pom pom pumpkins can be made from yarn in various sizes and colors, then arranged on a wreath form alongside other fall elements. They’re lightweight, durable, and add a soft, tactile quality that’s especially appealing for families with young children.
Experiment with different yarn textures and colors to create pumpkins that match your decor perfectly. Mix traditional orange with unexpected hues like blush pink, sage green, or mustard yellow for a modern twist on classic fall decor.
Felted Wool Leaf Wreath

Source: TheGrow via Pinterest
This elegant wreath showcases the natural beauty of felted wool leaves in rich autumn colors. The soft, matte texture of felted wool creates a sophisticated look that’s both cozy and refined—perfect for those who appreciate handmade quality.
Felted wool is more substantial than regular felt, giving the leaves a lovely weight and dimension. The material holds its shape beautifully and has a timeless, artisanal quality that elevates any fall decor.
Create your own by cutting leaf shapes from felted wool in complementary autumn shades, arranging them in an overlapping pattern on a simple wreath form, and securing with hidden stitches or strong adhesive. The result is a handcrafted piece that feels both modern and traditional.
Crochet Fall Wreath Free Patterns

Source: Crocht via Pinterest
For those who love working with yarn, these crochet fall wreath patterns offer a wonderful way to create cozy, handmade autumn decor. The patterns feature various shapes including leaves, acorns, pumpkins, and other fall-inspired elements that can be combined into stunning wreaths.
Crocheted wreaths have a unique charm—the soft texture and handmade quality create warmth and personality that’s hard to replicate with other materials. Each pattern offers something unique, allowing you to choose designs that match your skill level and personal style.
Whether you’re an experienced crocheter or willing to learn, these projects reward your time with beautiful, lasting decorations. The crocheted elements can be attached to wreath forms or even created as standalone pieces that hang beautifully on their own.
Burlap and Berry Fall Wreath

Source: Print Me a Party via Pinterest
This gorgeous Dollar Store DIY wreath proves that rustic elegance doesn’t have to cost a fortune. The combination of burlap’s natural texture with berry accents creates a welcoming autumn display that’s both budget-friendly and beautiful.
Burlap is a fall decorator’s best friend—it’s inexpensive, versatile, and instantly adds that farmhouse charm so many people love. Paired with berries (either faux or foraged), it creates a classic autumn look that works on any front door.
To recreate this look, gather burlap ribbon, berry picks, and a basic wreath form from your local dollar store. Layer the burlap for fullness, tuck in the berries strategically, and finish with a simple bow. The entire project can be completed in under an hour for less than $5.
Fall Sewing Crafts and Wreaths

Source: Colorfulfor via Pinterest
For those who love working with fabric and thread, these fall sewing projects offer wonderful opportunities to create unique, handmade wreaths and decorations. Fabric wreaths have a softness and texture that’s distinctly different from other materials.
Sewing allows for incredible customization—you can choose exact colors, patterns, and textures that perfectly match your decor. Fabric leaves, pumpkins, and other autumn elements can be sewn and then arranged on wreath forms for a cohesive, professional look.
Even basic sewing skills are enough to create beautiful fall wreaths. Simple techniques like gathering fabric for pumpkins, creating leaf shapes, or making fabric bows can elevate your wreath from ordinary to extraordinary. Plus, fabric wreaths can be stored flat and reused for years.
15 Adorable Fall Wreath Ideas

Source: Alexandra Design Finds via Pinterest
This curated collection brings together 15 of the most charming fall wreath ideas, each with its own personality and appeal. The variety ensures there’s inspiration for every taste, from traditional to modern, simple to elaborate.
What makes these wreaths “adorable” is their attention to detail, thoughtful color combinations, and that certain something that makes you smile when you see them. They’re the kind of wreaths that make guests feel welcomed and set a warm, inviting tone for the entire season.
Use this collection as inspiration to create your own unique wreath. Notice which elements appeal to you most—is it the use of unexpected colors, the combination of textures, or perhaps a particular arrangement style? Incorporate those elements into a design that’s uniquely yours.
Easy DIY Fall Grapevine Wreath

Source: WithLoveLive via Pinterest
The grapevine wreath is a fall decorating classic for good reason—it’s versatile, natural-looking, and incredibly easy to work with. This simple DIY project is perfect for beginners or anyone who wants a quick, satisfying craft.
Grapevine’s natural texture and neutral color make it the perfect backdrop for any fall color scheme. You can leave it bare for a minimalist look, or dress it up with leaves, pumpkins, berries, ribbon, or any combination of autumn elements.
To create your own, start with a grapevine wreath form (available at any craft store), fluff and shape it to your liking, then add your chosen decorations using hot glue or floral wire. The organic nature of grapevine means there’s no wrong way to arrange elements—just let your creativity guide you!
Love these ideas? Follow @theclutteredblog on Pinterest for more cozy, practical gift inspiration!